Menu Management
Menu Management replaces repetitive free-text meal entry with a shared monthly plan. Build a library of the foods your centre serves, assemble them into a monthly menu, and share that menu with teachers and parents — complete with allergy alerts for enrolled children.
How to Access
Admins and Owners open Meals & Menus in the sidebar. The page has two tabs:
- Food Library — the list of foods and drinks your centre uses
- Menus — monthly menu plans built from those food items
Teachers and parents see a read-only Menu item in their sidebar showing the current month's published menu.
Food Library
The food library is where you capture every meal, snack, and drink your centre serves. Items you add here become selectable when you build a menu or log a meal.
First-time setup with Quick Start
When your library is empty, you can skip straight to a curated list of 21 common foods — complete meals, snack items, and drinks — with icons and allergens pre-filled.
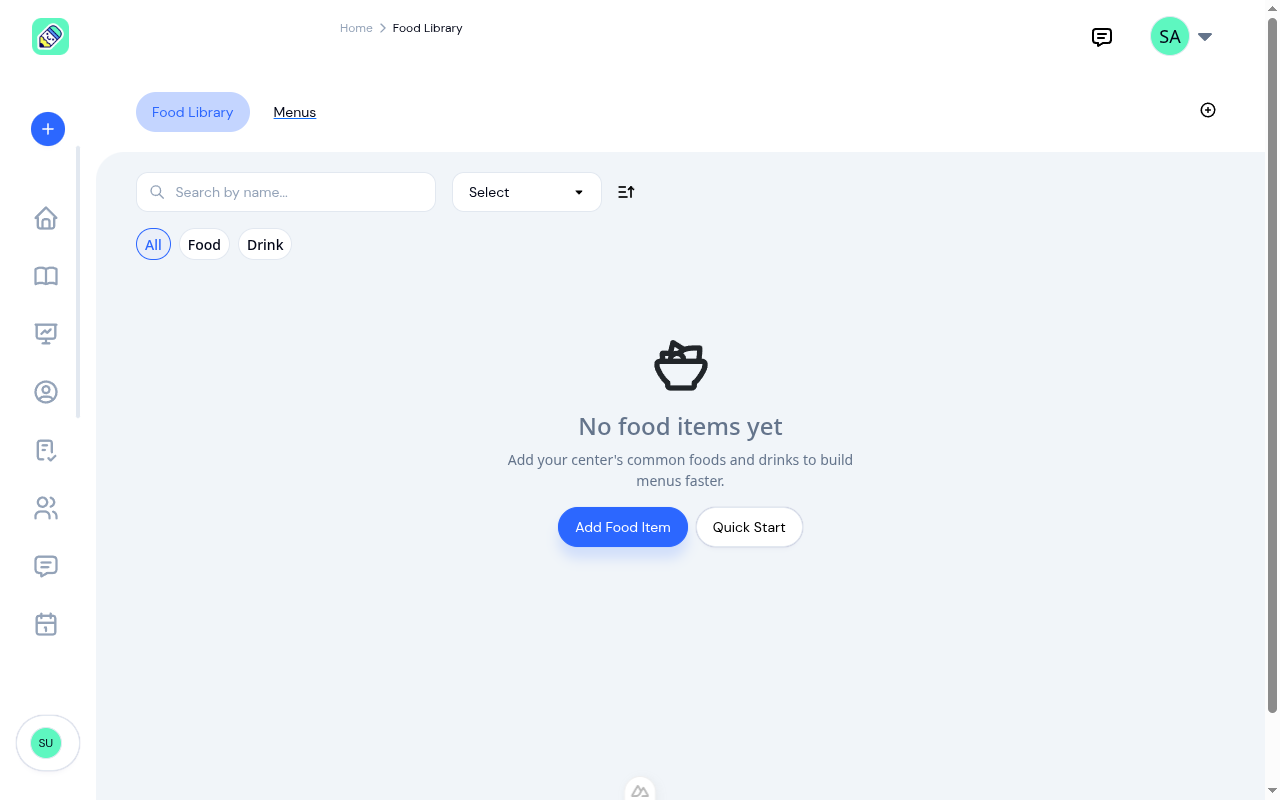
Click Quick Start to seed the library, then edit or remove items as needed. You'll have a working library in seconds.
Adding food items manually
Click the + button in the top-right to add an item.
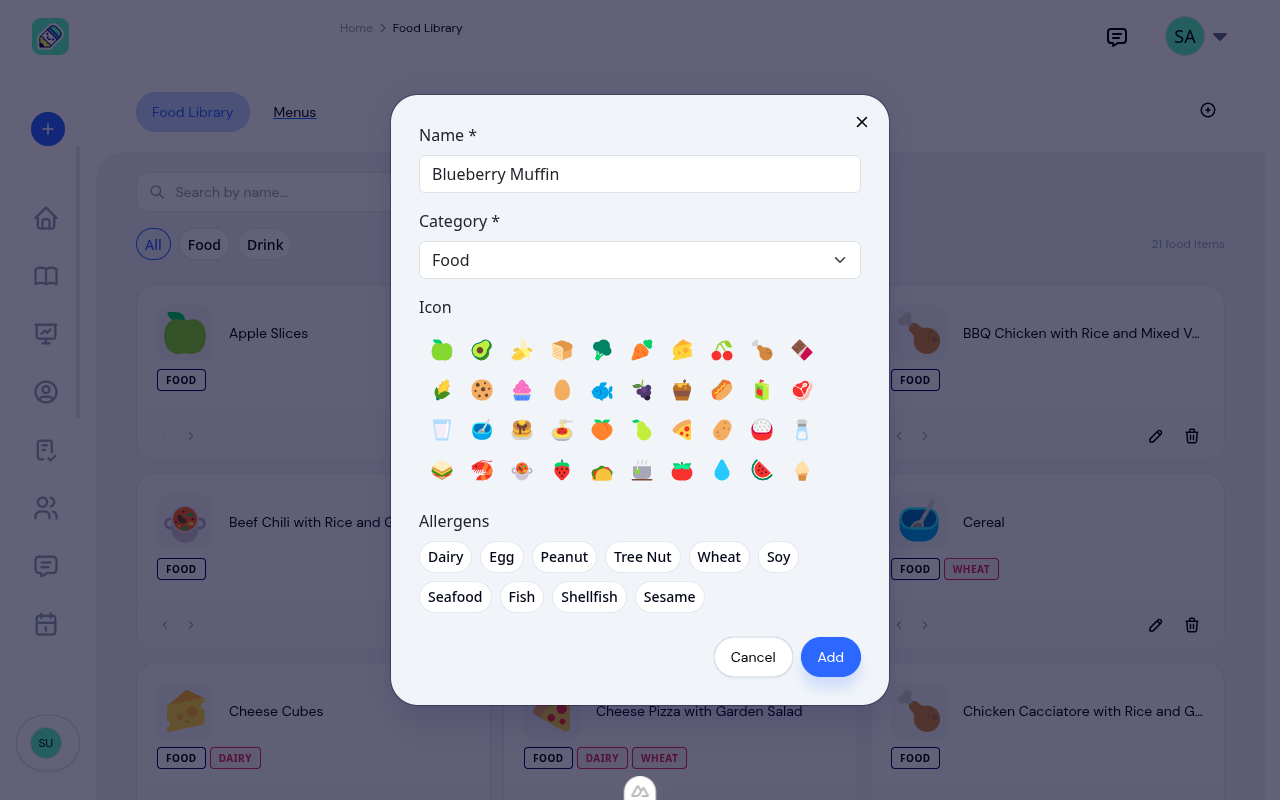
Fill in the details:
- Name — what the food or drink is called. KidzLog auto-suggests an icon based on the name (for example, typing "Apple Slices" suggests the apple icon).
- Category — Food or Drink. Drinks appear separately in the meal logger.
- Icon — pick from 40 Fluent Emoji food icons. Leave blank to fall back to a generic food emoji.
- Allergens — tag any of the common allergens your centre screens for (dairy, egg, peanut, tree nut, wheat, soy, seafood, fish, shellfish, sesame). These drive the allergy alerts elsewhere in the app.
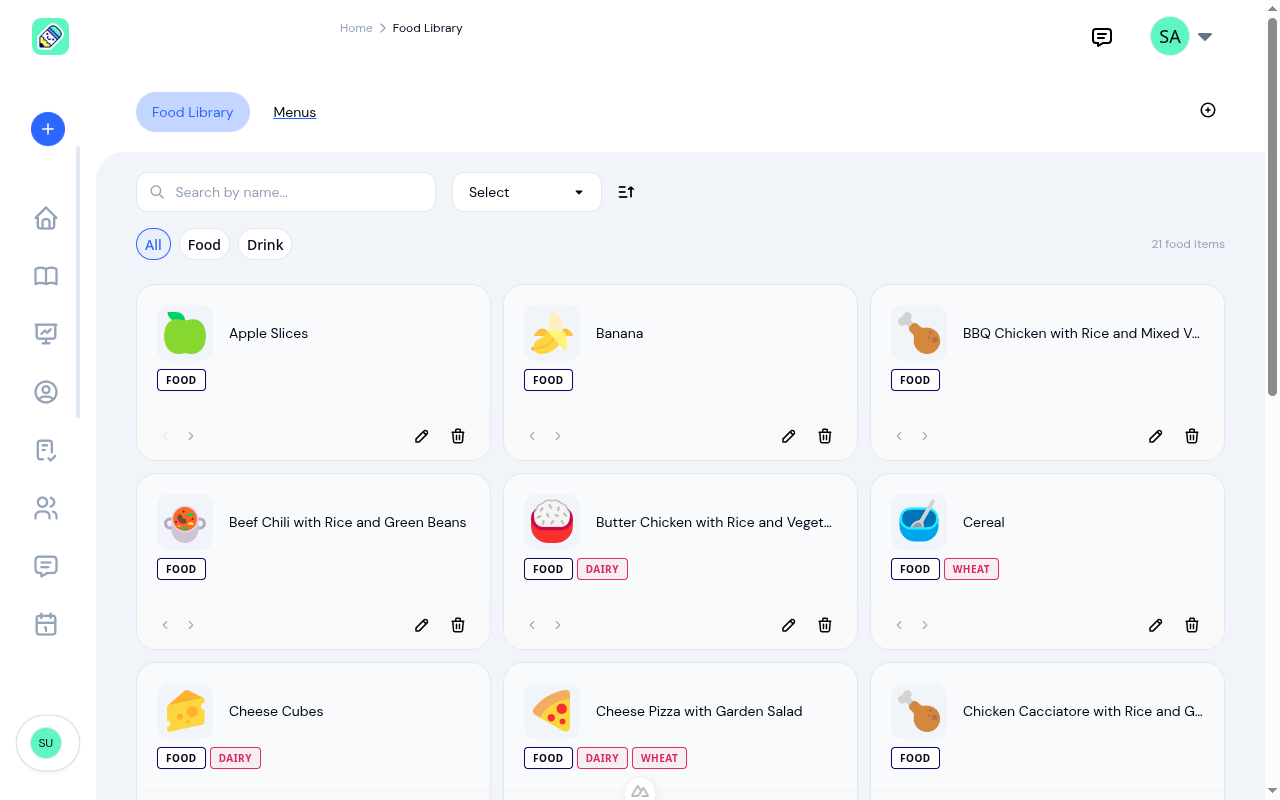
Sorting, filtering, and searching
Use the All / Food / Drink filter chips to narrow the grid. The search box matches on name. Sort by name or date created using the dropdown. Drag-free reordering: click the left/right chevrons on a card to move it earlier or later in the list — that same order is used when teachers pick items during meal logging.
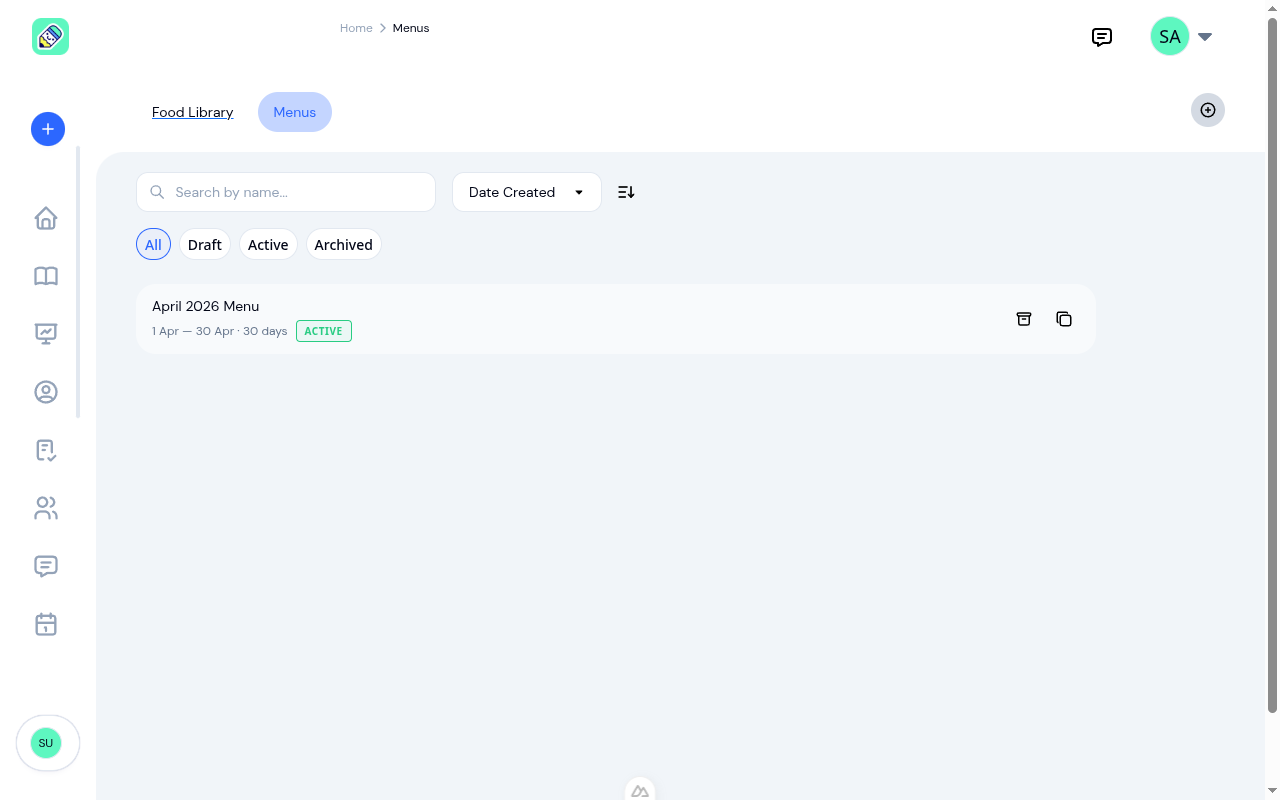
Menus
A menu is a dated plan — typically one calendar month — mapping food items to specific days and meal types. Switch to the Menus tab on the Meals & Menus page.
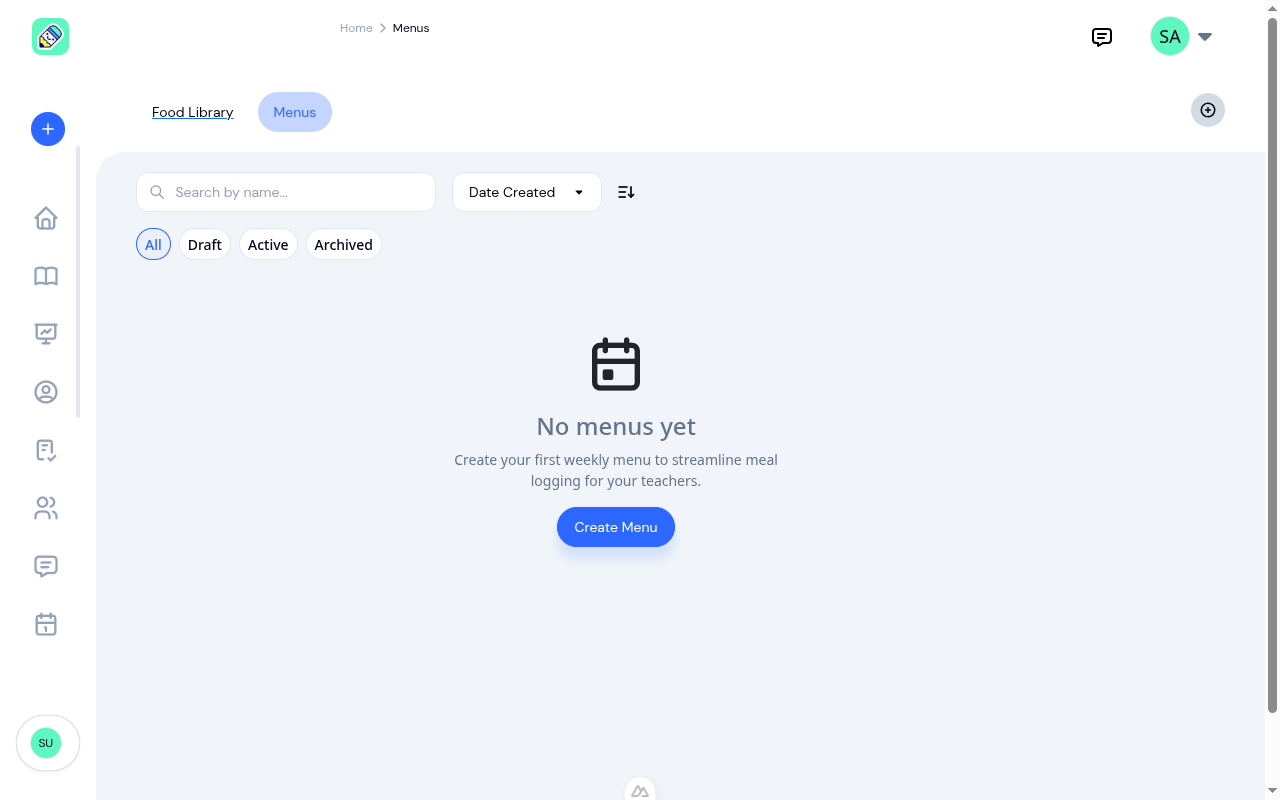
Creating a menu
Click Create Menu (or the + in the top-right). The dialog pre-fills the current month's name and date range.
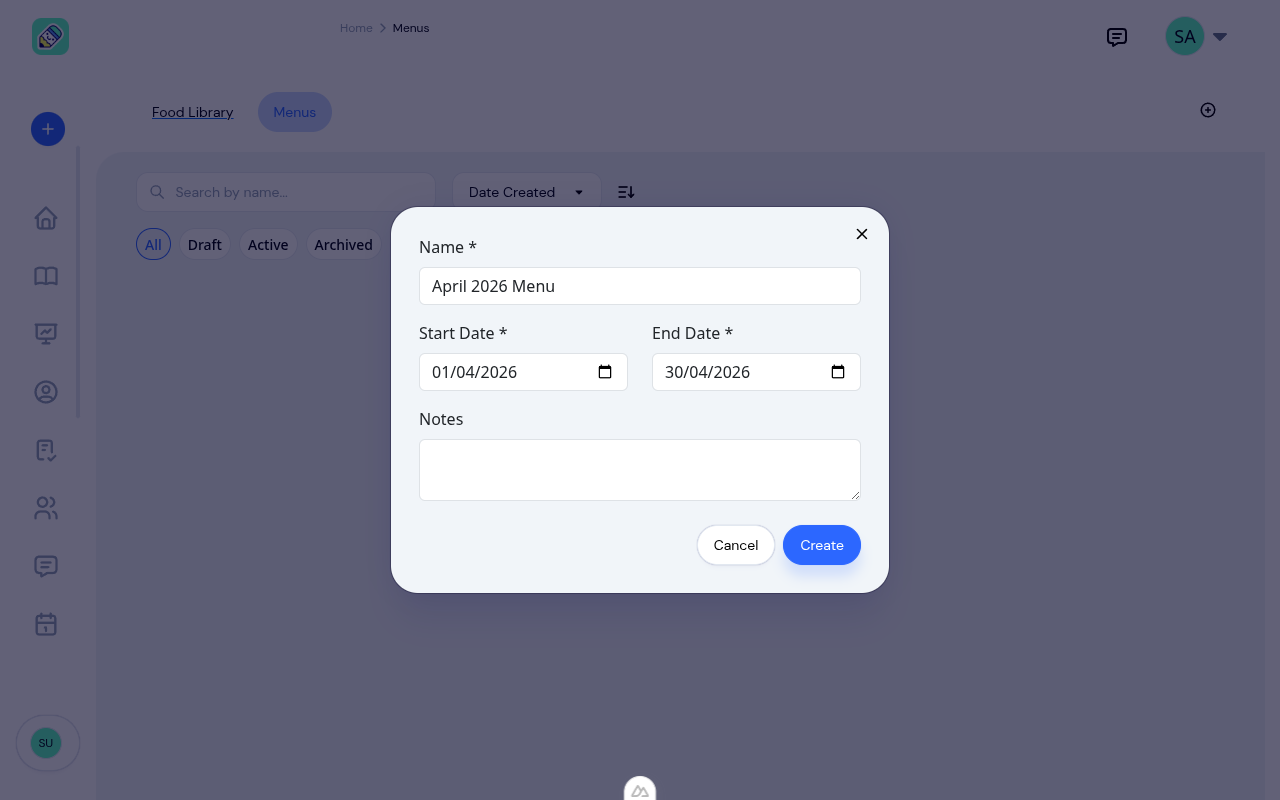
- Name — defaults to "{Month} {Year} Menu" (for example, "April 2026 Menu")
- Start Date / End Date — default to the first and last day of the current month
- Notes — optional context (for example, "Spring rotation — vegetarian alternatives available on request")
Click Create to open the builder.
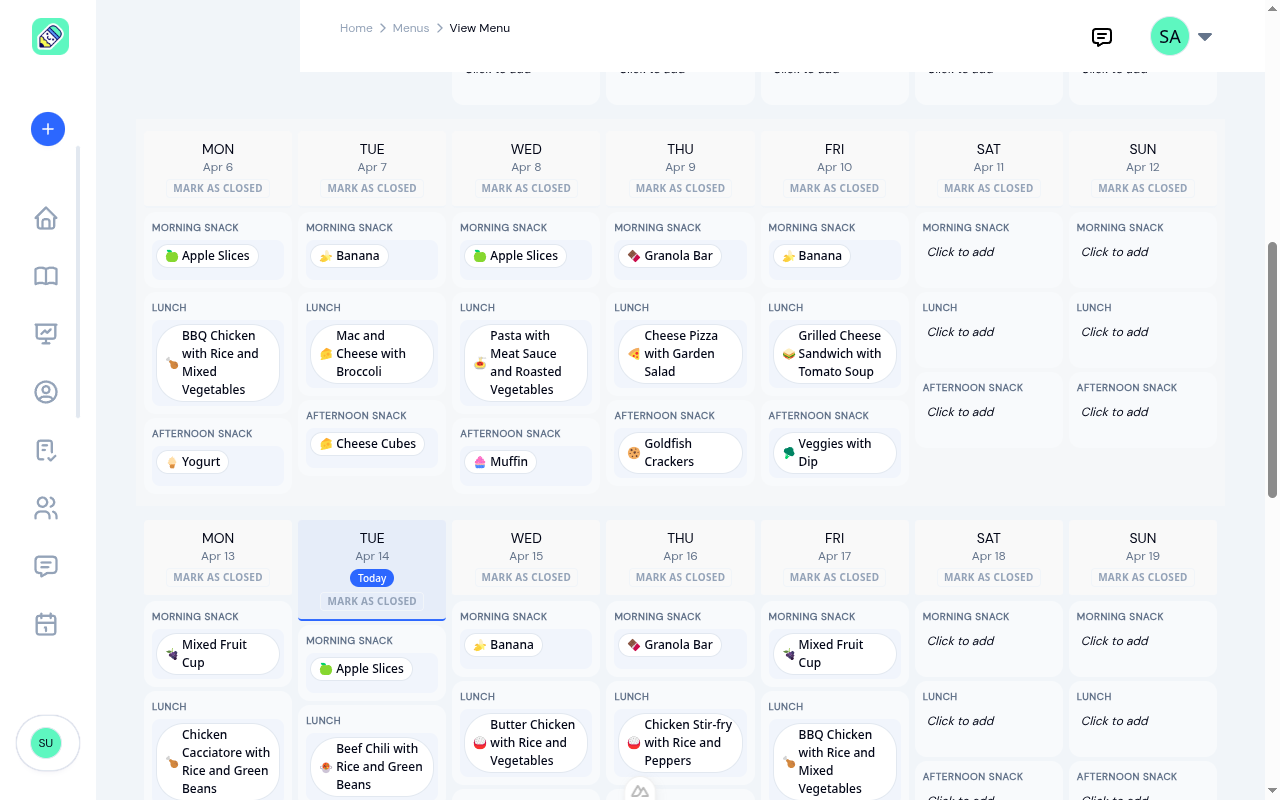
Building the menu
The builder shows the full month as a weekly grid. Each day has three cells by default — Morning Snack, Lunch, and Afternoon Snack — the three meal types most centres plan for.
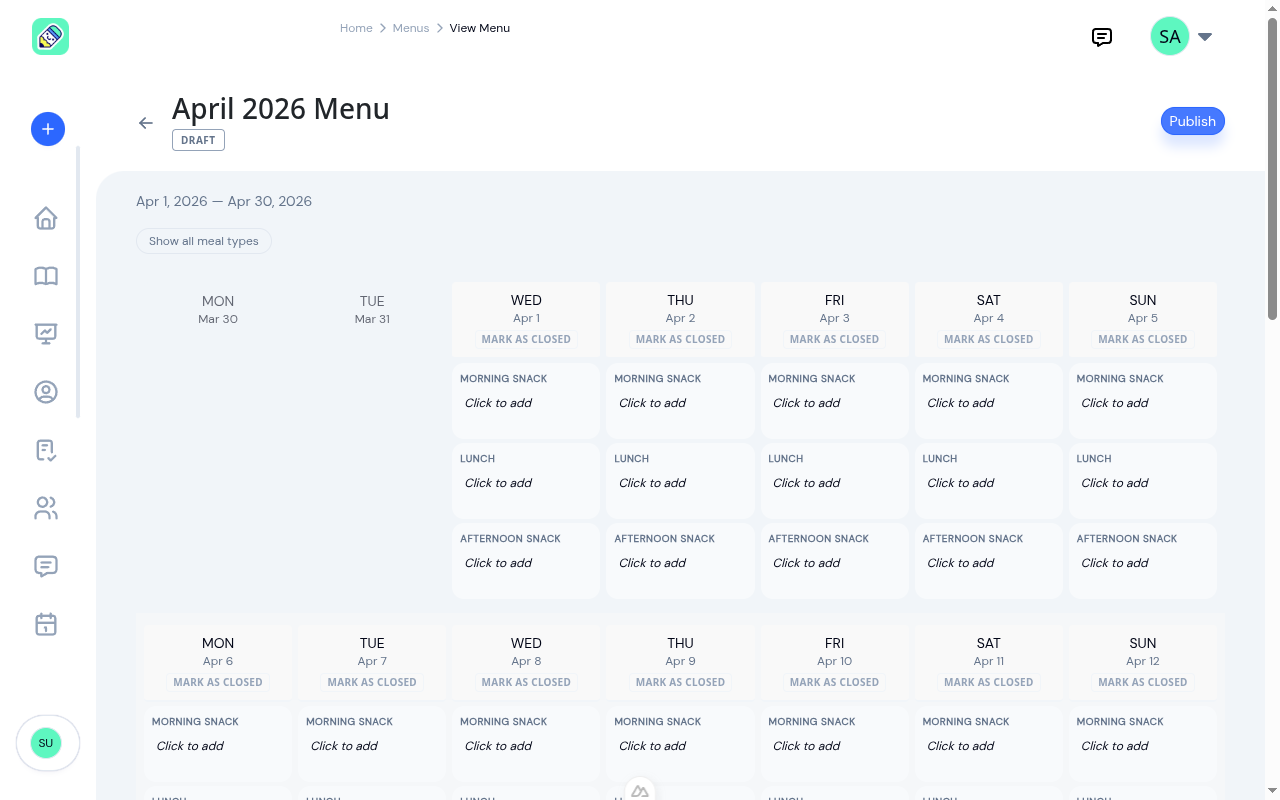
Click any Click to add cell to pick food items for that meal.
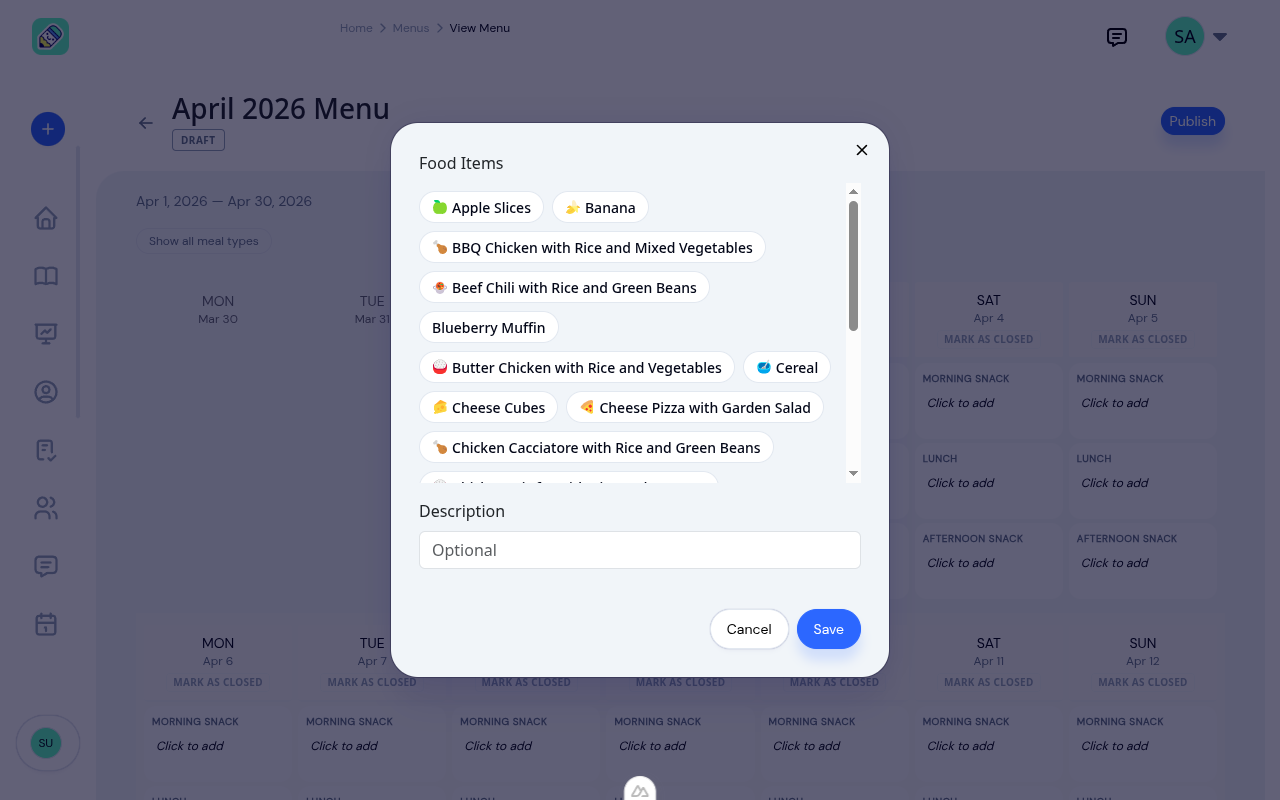
Pick one or more food items from the library. You can also add a free-text Description for meals that aren't in your library yet (for example, "Parent-provided birthday cake"). Click Save.
As you fill in days, the grid populates with food chips — complete with the same icons you chose in the library.
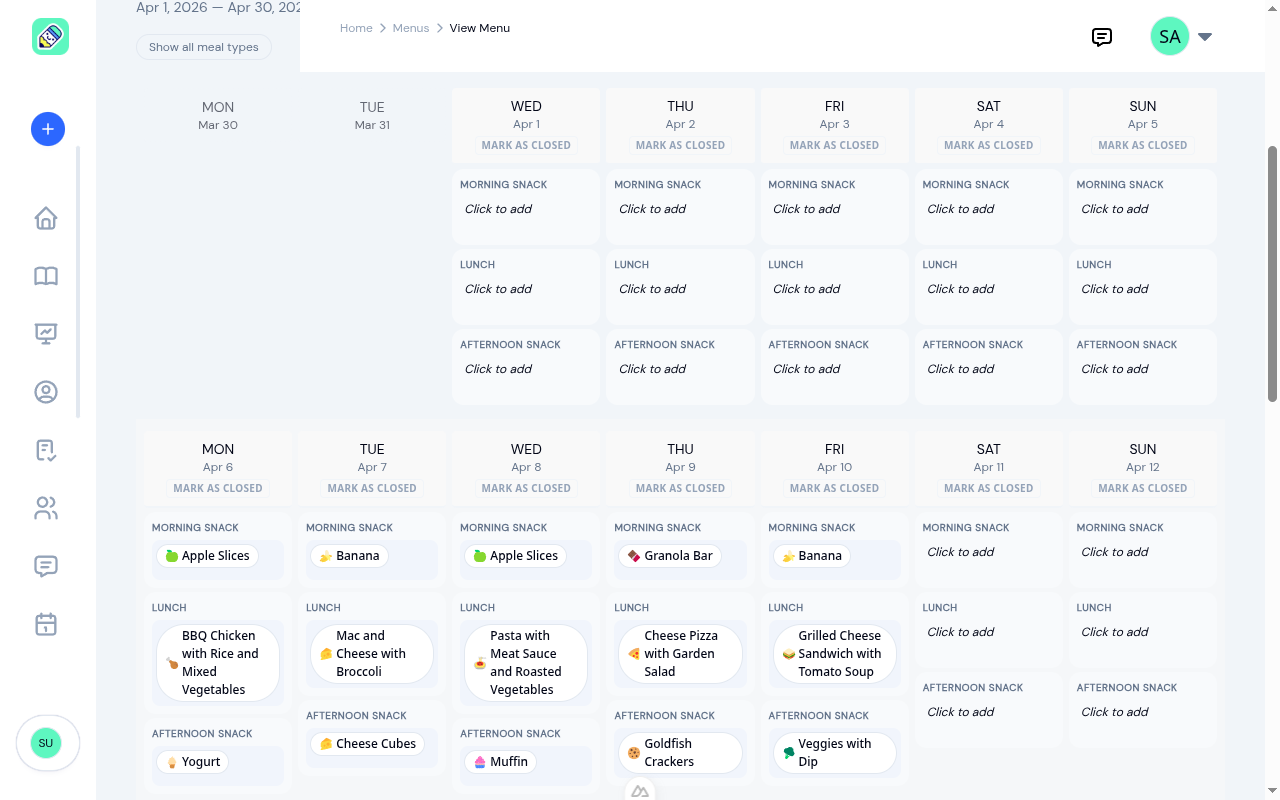
The current day is highlighted with a Today badge so you always know what teachers and parents are looking at right now.
Showing all meal types
By default the builder shows three meal types. If your centre also serves breakfast, a late snack, or dinner, click Show all meal types to expand every day to six slots.
Closed days and holidays
Click Mark as Closed above a day to flag it as a holiday or closure. The day's meal slots disappear and a Closed label takes their place — useful for statutory holidays and PD days. Click the label again to reopen the day.
Publishing, archiving, and duplicating
A menu moves through three statuses:
- Draft — visible only to admins; not yet shared with teachers or parents
- Active — published and visible to teachers and parents; integrated into meal logging
- Archived — historical record, hidden from teachers and parents but searchable in the list
Click Publish on a draft to make it active. Click Archive on an active menu when the month ends.
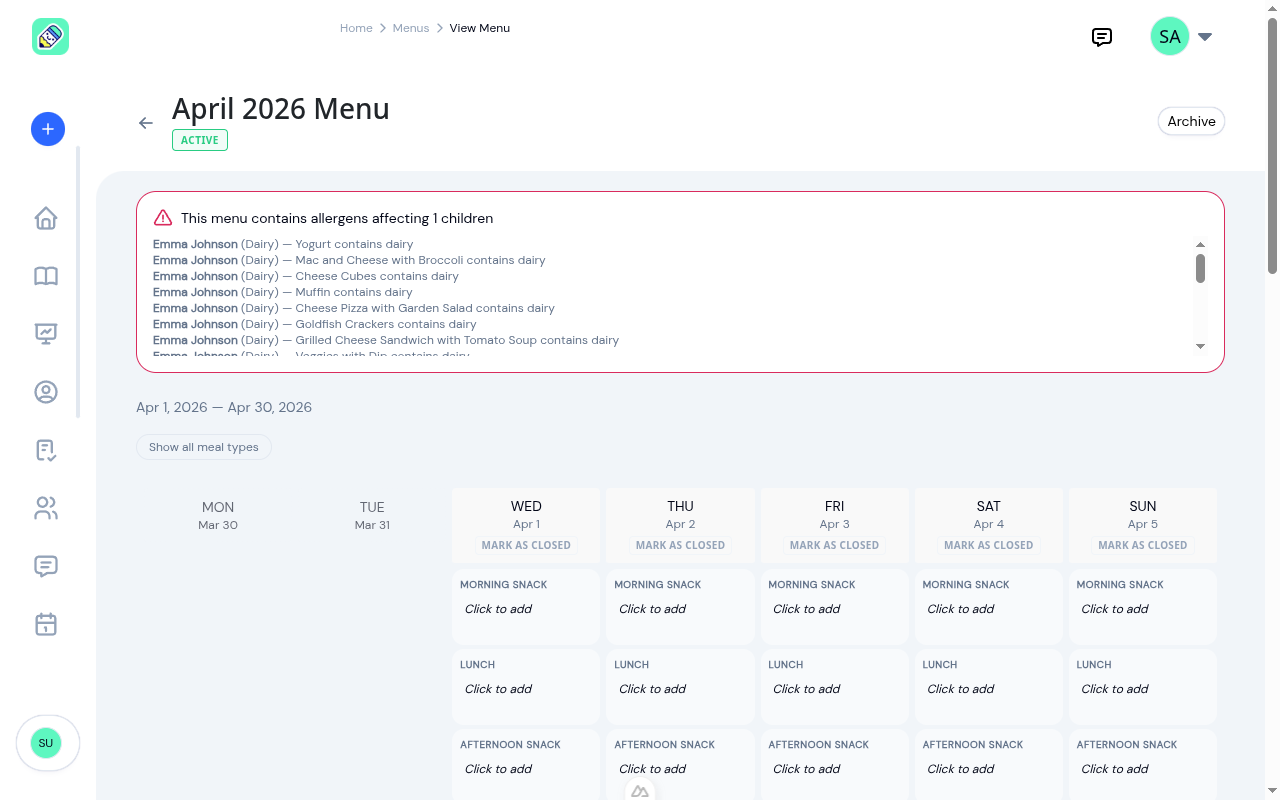
Allergy report
If any children enrolled at your centre have allergies matching items in the menu, a banner at the top of the builder shows exactly which children are affected and on which items.
Teacher View
Teachers with the Menu Management module enabled see a Menu item in their sidebar. They open it to see the same month grid parents see — minus the child-specific allergy highlights. It's a quick reference for what's being served today and the rest of the month.
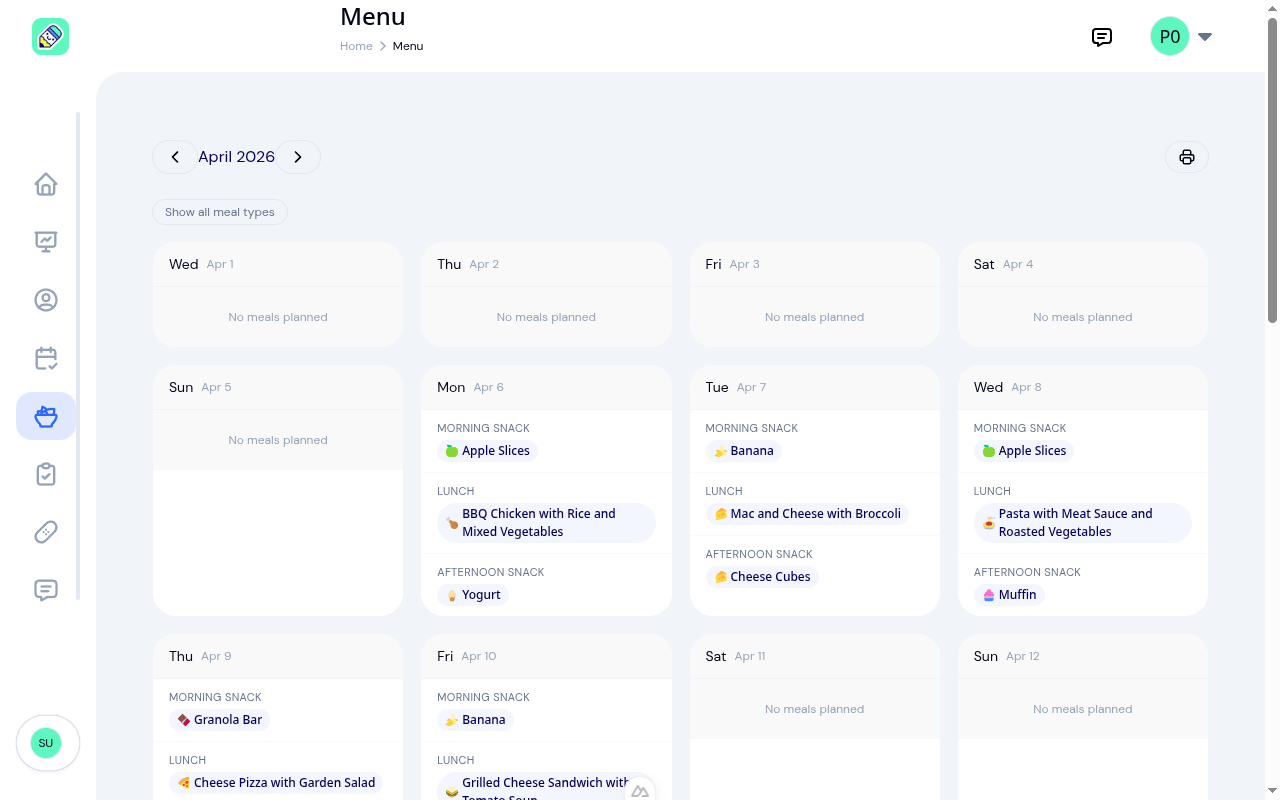
Teachers can navigate between months, toggle all six meal types, and print a hard copy for the kitchen or classroom noticeboard.
Parent View
Parents see a Menu item in their sidebar when the Menu Management module is enabled. They see the current month's active menu — with the foods their child is allergic to highlighted in red.
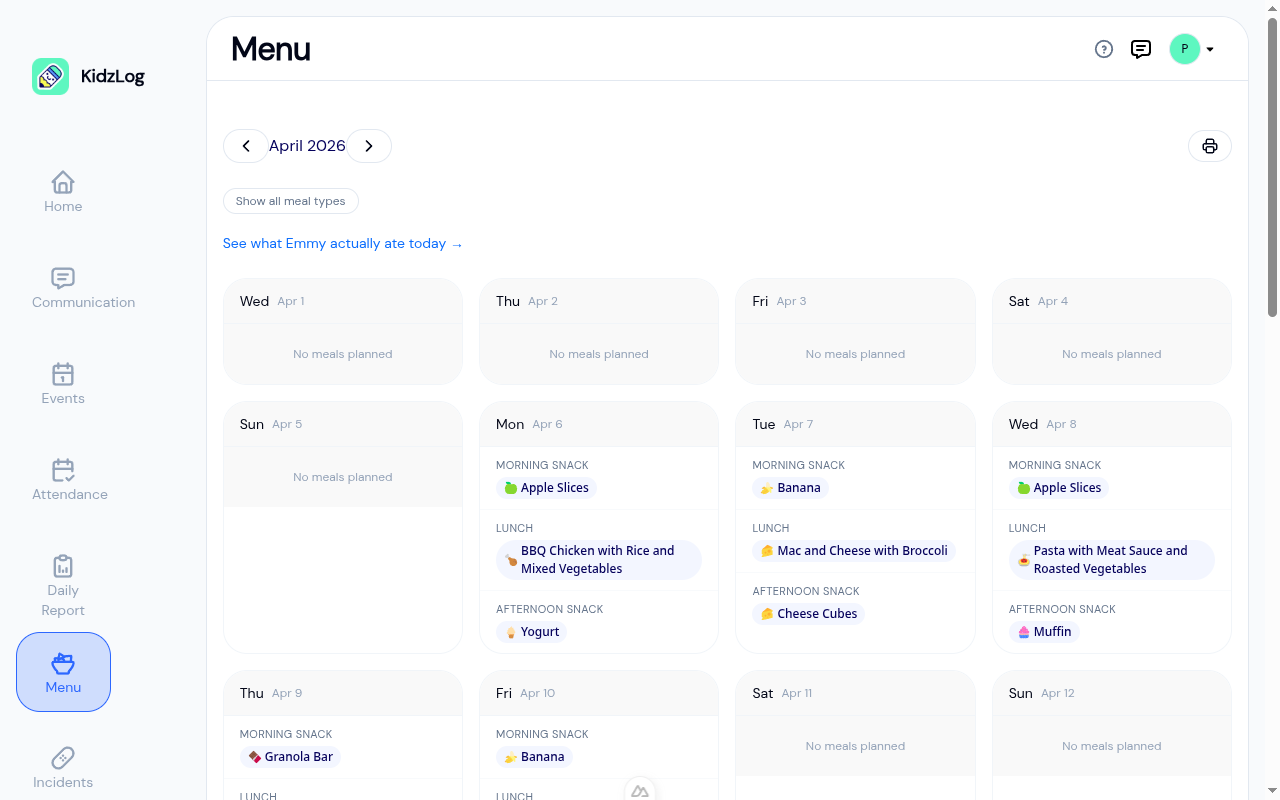
Parents can:
- Navigate to previous or future months using the arrows next to the month name
- Toggle between the three main meal types and all six with Show all meal types
- Click Print (printer icon) for a printer-friendly version
- Click the See what {child} actually ate today link to jump to the child's daily report
If today's menu contains an allergen that matches something on the child's profile, an amber warning banner appears above the grid — and those specific food items are flagged on the day.
Common Tasks
Carry a menu forward to next month
Open the Menus tab, click the copy icon next to the menu you want to reuse, enter a new start date, and click Duplicate. The new menu is created as a draft with all the same meals shifted to the new date range — edit as needed before publishing.
Add a missing food item while building a menu
In the meal editor, click + Add Food Item to create a new food item without leaving the builder. It's saved to your library immediately and added to the meal you're editing.
Hide breakfast or dinner slots
By default the builder and viewer show only the three primary meal types (morning snack, lunch, afternoon snack). If you don't serve breakfast or dinner, you don't need to do anything — those slots stay hidden. Click Show all meal types only if you want to plan them.
Mark a week of public holidays
Click Mark as Closed on each closed day. The day is flagged for teachers and parents with a Closed label — they'll know in advance not to expect a meal log for that day.
Frequently Asked Questions
Each dated range should have one active menu. Overlapping active menus aren't blocked, but the teacher and parent views pick the first active menu that covers mid-month — if two menus overlap, one will be ignored. Archive the old menu before publishing a new one for the same period.
The Menu Management module must be enabled in Center Settings → Modules. If it's disabled, the sidebar item is hidden for all roles at your centre.
Food items on active menus are preserved as chips — you'll see them in the parent and teacher views even after deletion. However, you can't add a deleted item to new meals. The builder warns you if you try to delete an item that's in use.
No. Each parent only sees allergens matching their own child's profile. The admin-only allergy report in the builder shows every affected child across the centre.
No — meal logging works with or without a menu. When a menu is active, teachers can tap-to-log from the day's menu instead of typing descriptions. Without a menu, they use the food library directly (or free-text as before).