

Children
The Children page is where you manage every child enrolled at your center. From here you can add new children, view and edit their profiles, link parents, track enrolments, and archive children who are no longer attending.
Viewing the Children List
Navigate to Children in the sidebar to see all active children at your center.
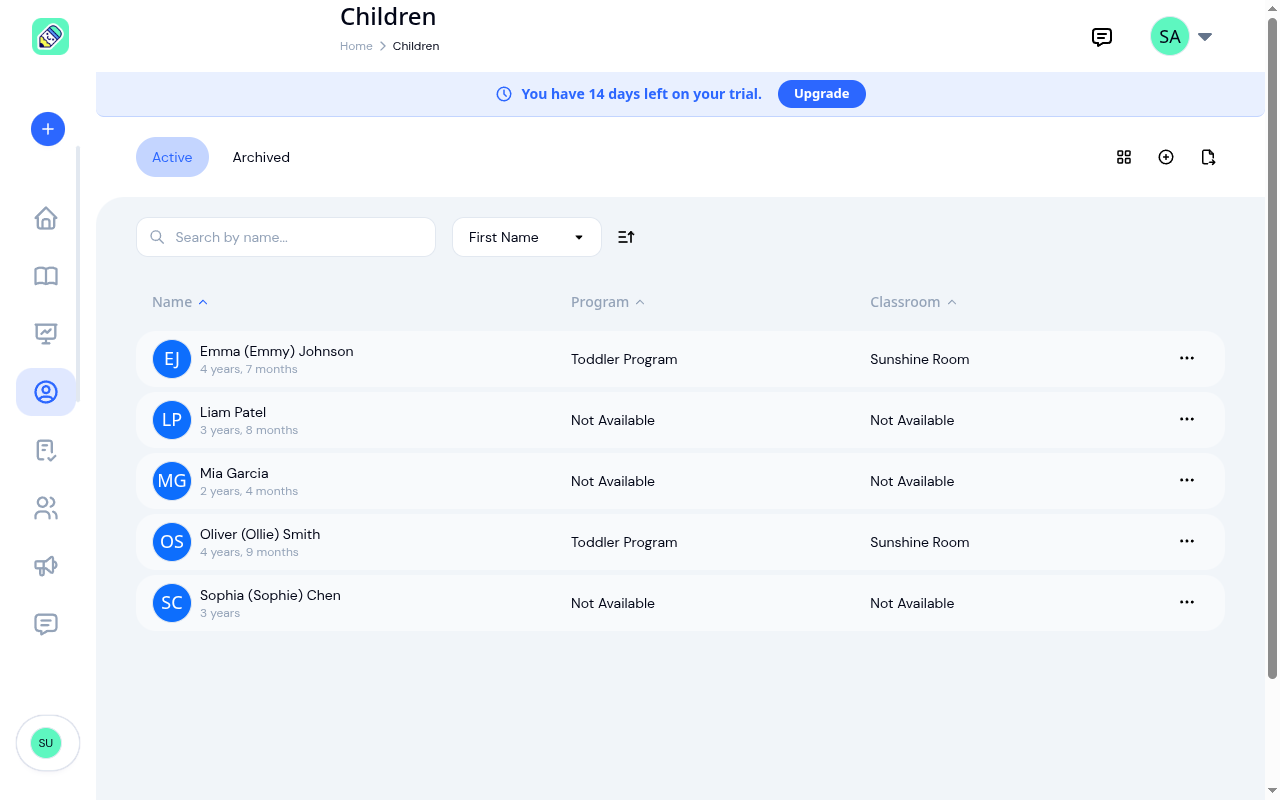
The list displays each child's name, age, program, and classroom. Children not yet enrolled in a program show "Not Available" in those columns.
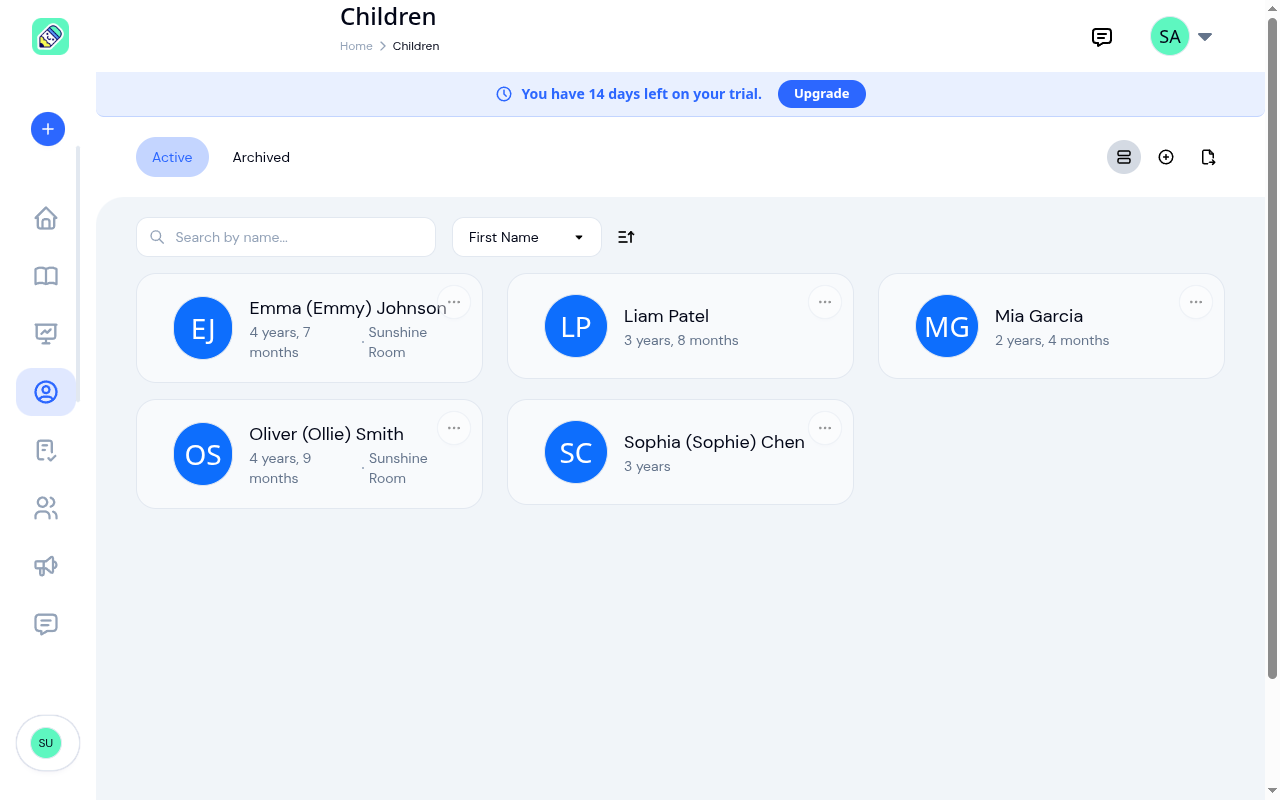
Switching Between List and Grid View
Use the view toggle buttons in the top-right corner to switch between list and grid layouts.
Searching and Sorting
- Search: Type in the search box to filter children by name
- Sort: Use the dropdown to sort by First Name, Last Name, Preferred Name, Date of Birth, Program, Classroom, or Date Added
- Sort direction: Click the arrow button next to the sort dropdown to toggle between ascending and descending order
- Column headers: In list view, click any column header (Name, Program, Classroom) to sort by that column directly
Showing Only Children Who Aren't Enrolled
Above the search box, two buttons let you narrow the active list:
- All Active — every active child (the default)
- Not Enrolled — only children who don't have an active program enrolment
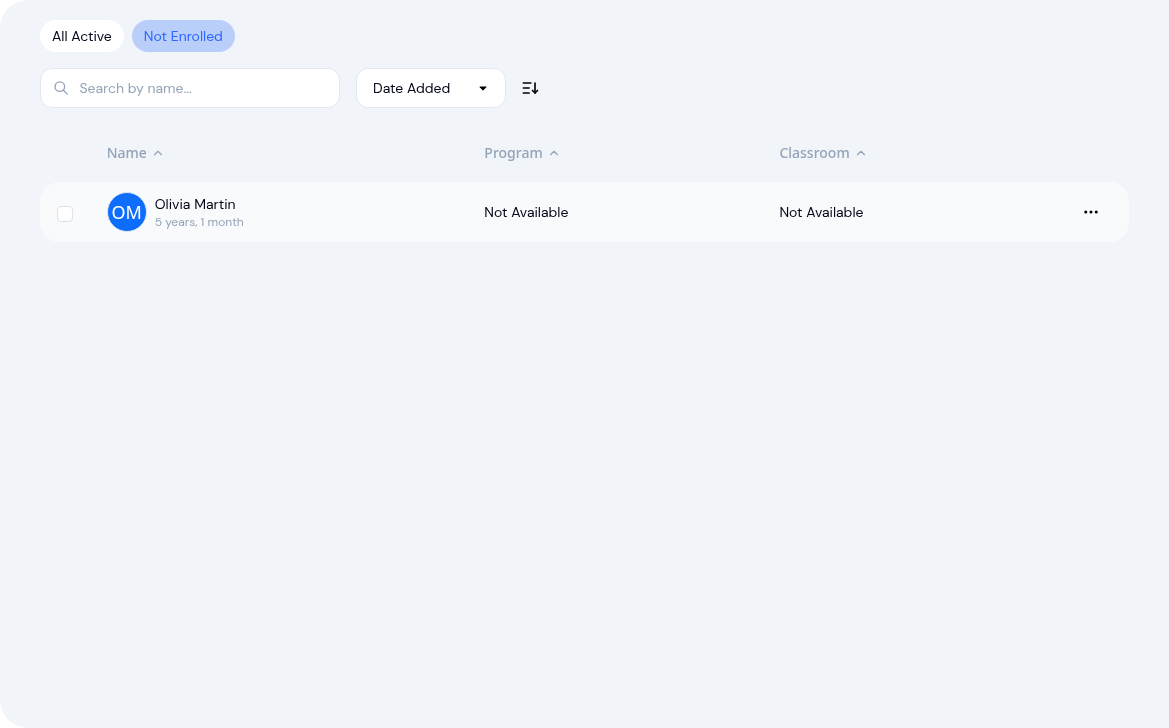
This is a quick way to catch newcomers who still need to be placed into a program. When you switch to Not Enrolled, the list automatically sorts by Date Added (newest first) so the most recent additions appear at the top. If every active child already has an enrolment, you'll see an "All caught up" message.
Active and Archived Children
Use the Active / Archived tabs at the top to switch between currently active children and those who have been archived.
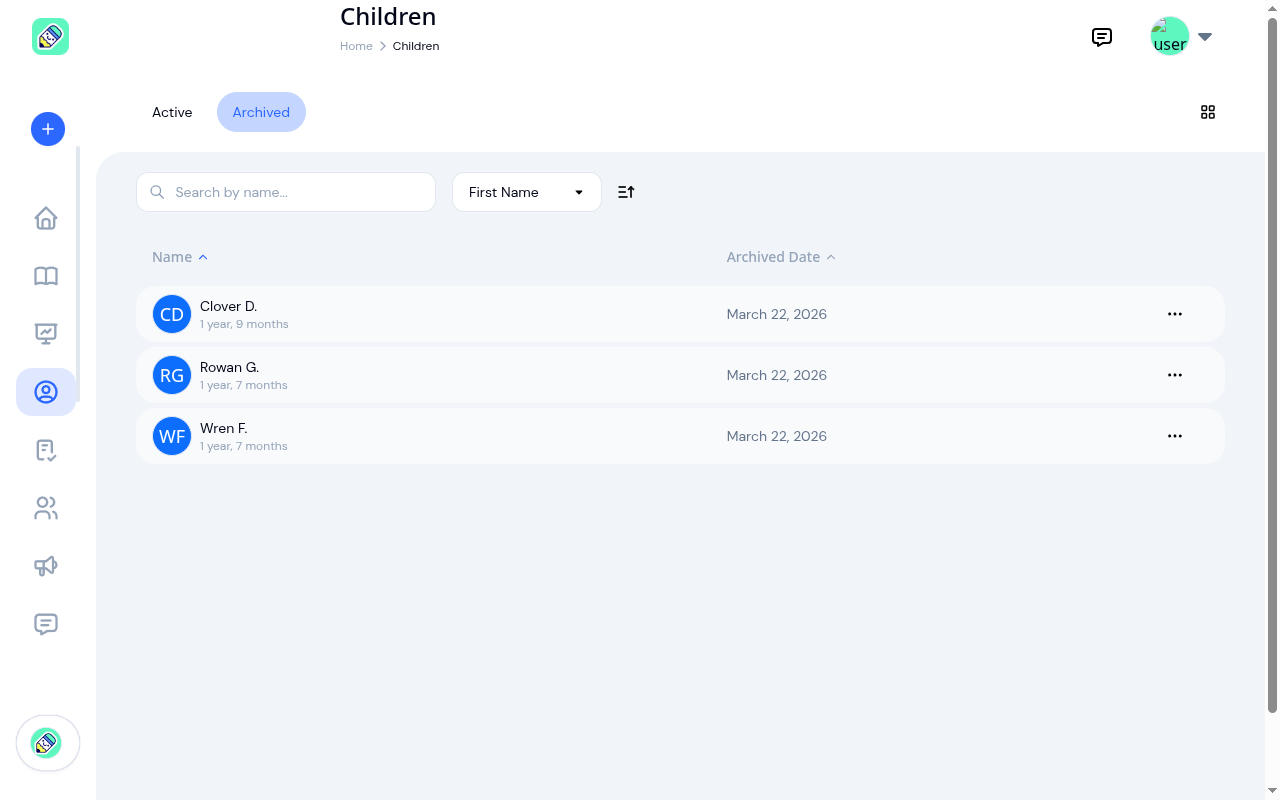
The archived list shows each child's name and the date they were archived. You can unarchive a child from this view using the actions menu.
Adding a Child
Open the Add Child wizard
Click the + (plus) button in the top-right area of the Children page. This opens a two-step wizard.
Enter child information
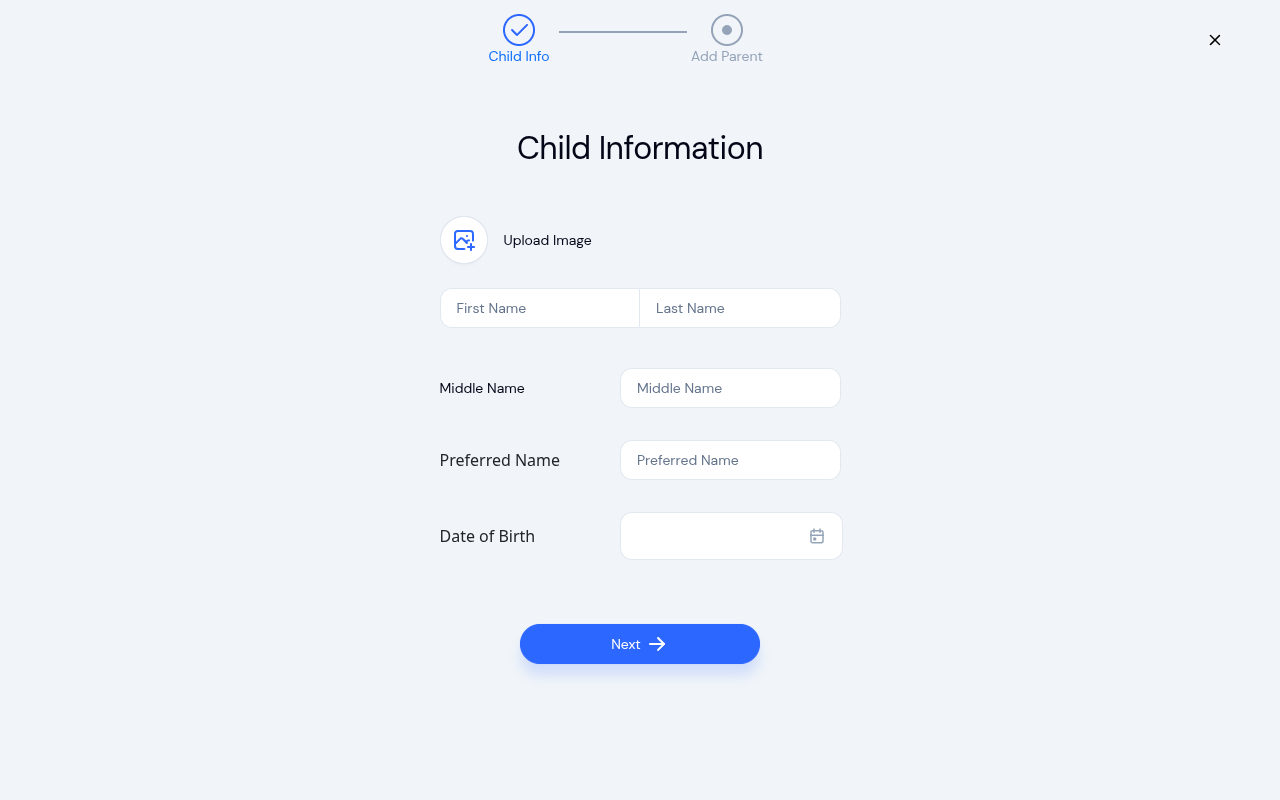
Fill in the child's details:
- First Name and Last Name (required)
- Middle Name (optional)
- Preferred Name (optional) — this is how the child prefers to be called
- Date of Birth (required)
- Photo (optional) — click Upload Image to add a profile photo
Click Next to continue.
Add a parent (optional)
On the second step, you can add a parent or guardian and optionally invite them to the Parent Portal. You can also skip this step and add parents later from the child's profile.
Importing Children from a Spreadsheet
If you're moving an existing roster into KidzLog, you can add many children at once from a CSV file instead of entering them one by one. KidzLog shows you exactly what will happen before anything is saved.
Open the import screen
On the Children page, click the import button (the file-import icon) in the top-right area. On an empty Children page, you can also use the or import existing children link.
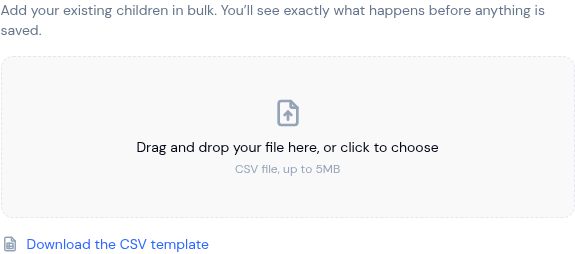
Download and fill in the template
Click Download the CSV template to get a starter file with the right columns: First Name, Last Name, Middle Name, Preferred Name, Date of Birth, Class, and Program. Fill in one row per child. First Name and Last Name are required. Date of Birth is optional, but if you include it, it must be a recognizable date. The Class and Program columns are also optional. If you fill them in, the child is placed into that classroom and program; if you leave them blank, the child is added without an enrolment.
Upload your file and review the preview
Drag your file onto the upload area or click to choose it. KidzLog reads the file and shows a preview before saving anything.
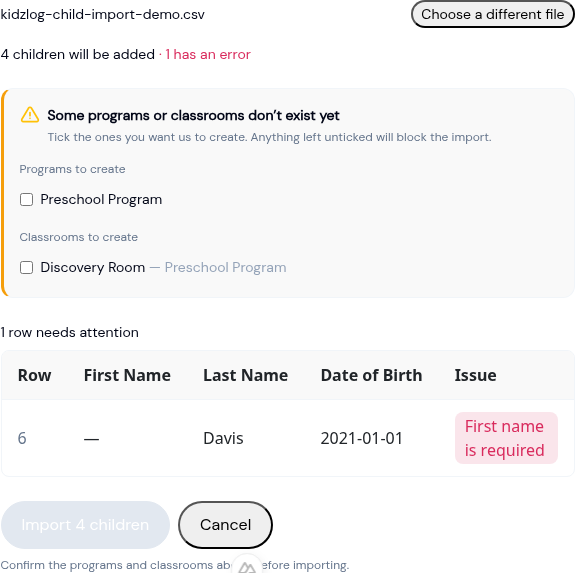
The preview tells you:
- How many children will be added, plus how many rows are already in your center (skipped) or have errors
- Programs or classrooms that don't exist yet — tick the ones you want KidzLog to create. Anything left unticked will block the import, so the children in those rows can't be added until you either tick the box or fix your file
- Rows that need attention — each problem row is listed with its row number and the specific issue (for example, a missing first name)
Import
Once any new programs and classrooms are ticked, click the import button, which shows how many children will be added (for example Import 4 children). KidzLog adds the valid children and creates the programs and classrooms you confirmed.
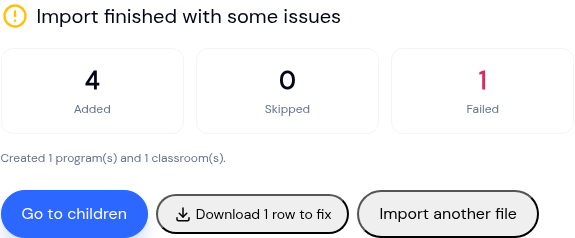
The results screen shows how many children were added, skipped, and failed. If any rows had errors, click the download button (for example Download 2 rows to fix) to get a CSV containing only those rows and their issues, so you can correct them and import again.
Viewing a Child's Profile
Click any child in the list to open their detail page.
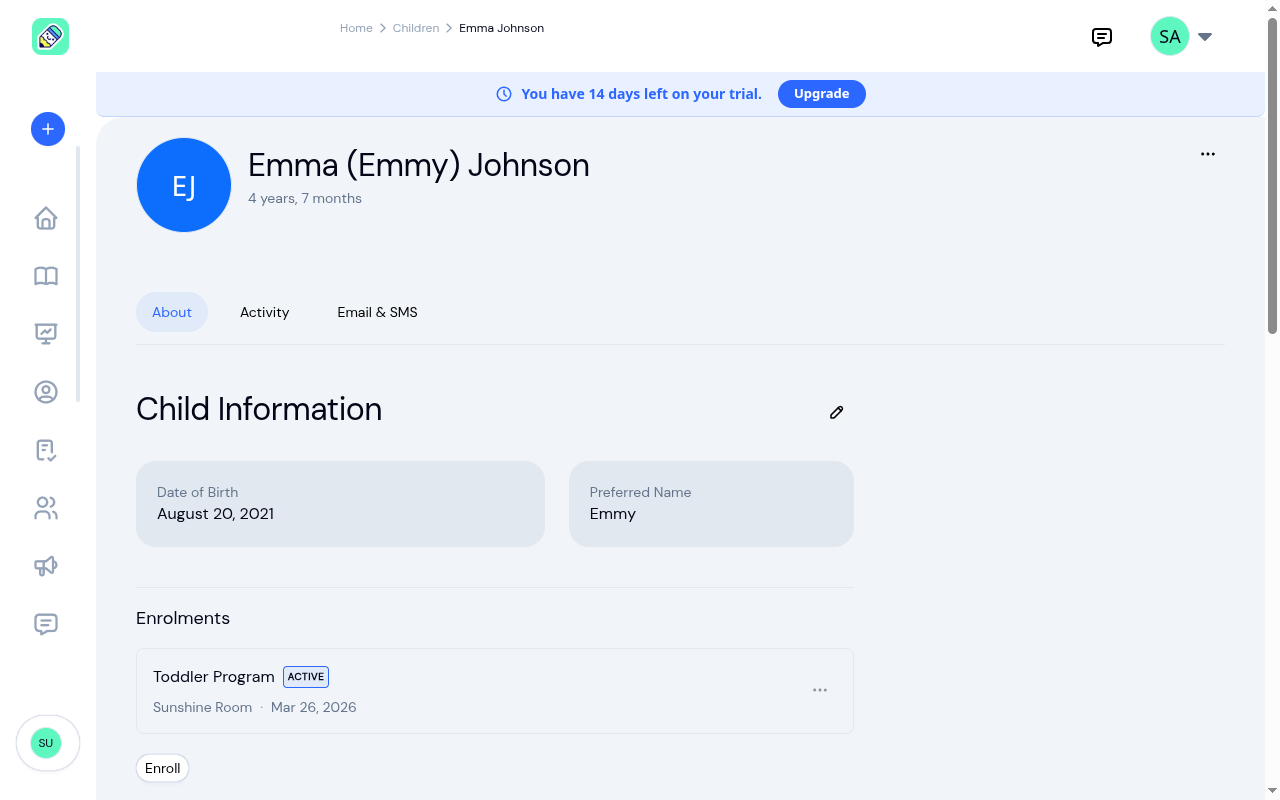
The profile page has up to three tabs:
- About — Child information, enrolments, parents/guardians, emergency contacts, and health information
- Activity — Activity feed for the child (shown when the Activity Feed module is enabled)
- Documents — Document requests sent for this child (shown when the Documents module is enabled)
Child Information
The About tab shows:
- Date of Birth, Preferred Name, and Address — click the pencil icon to edit
- Enrollments — Active programs and classrooms with status badges. You can enrol, withdraw, or move a child to a different classroom from here
- Parent/Guardian Information — Linked parents with options to add, edit, view, or remove
- Emergency Contacts — Contact information for emergencies
- Health Information — Medical conditions, immunizations, and allergies
Health Information
The bottom of the About tab holds the health details staff need at a glance, split into Medical Condition, Immunization, and Allergy. Each section has a + button to add an entry. On a saved entry, the arrow button opens it for reading and the ... menu holds Edit and, for owners and admins, Delete.
Recording an allergy
Click + next to Allergy to open the Add Allergy window. Allergy trigger is a searchable list of common allergens rather than a plain text box: click it, then start typing to narrow the list down.
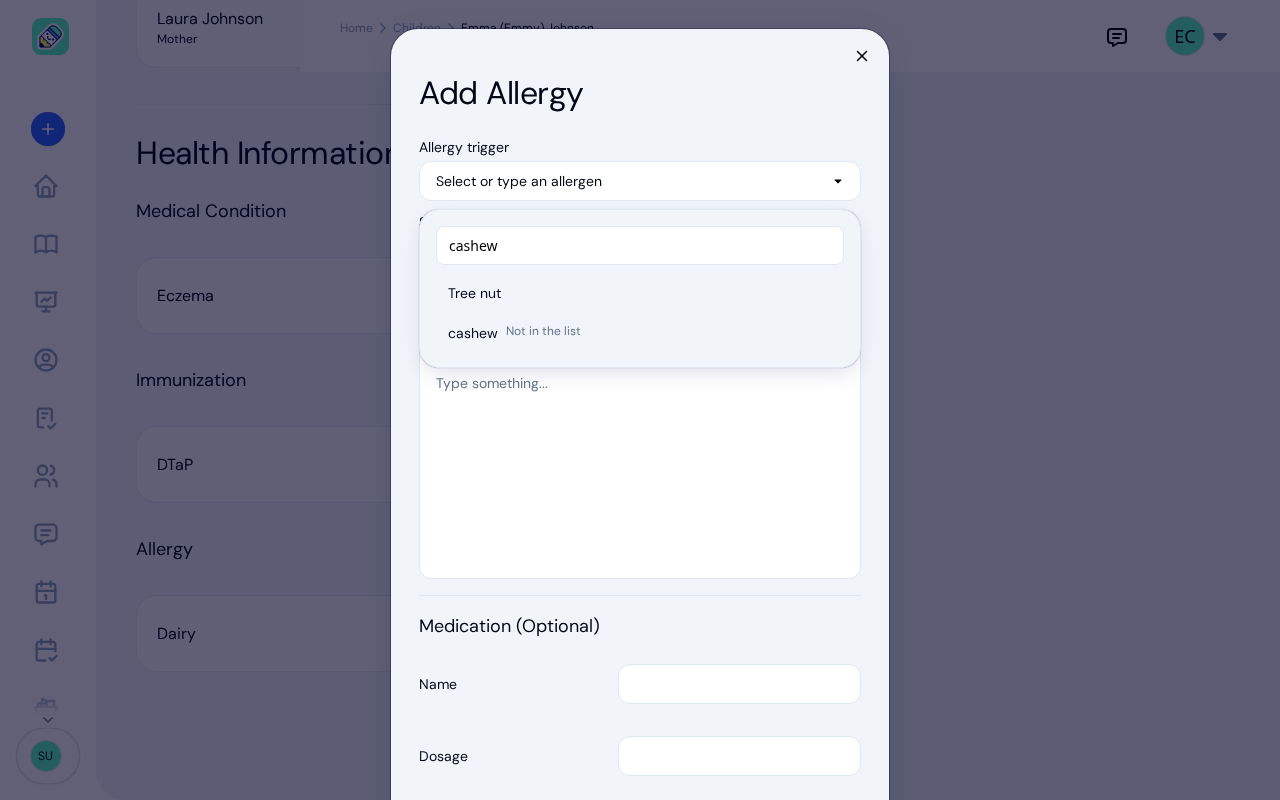
The list covers 23 allergens. Fifteen are foods (dairy, egg, peanut, tree nut, wheat, gluten, soy, fish, shellfish, mollusc, sesame, mustard, celery, sulphite, and lupin) and eight are labelled Non-food (latex, pollen, dust mite, pet dander, insect sting, mould, penicillin, and NSAID).
The search matches everyday names as well as the label on screen, so you don't need to know which heading an allergen sits under. Typing "cashew" finds Tree nut, "milk" finds Dairy, and "bee" finds Insect sting.
Fill in the rest of the window and click Save:
- Symptoms (required) — pick one or more from the list
- Preventative Measures (required) — what staff should do to avoid a reaction
- Medication and Dosage (optional)
- Instructions (optional) — what to do if a reaction happens
Documents
When the Documents module is enabled, the child's profile gains a Documents tab. It lists every document request that has been sent for this child, so you can track signatures and acknowledgements without leaving the profile.
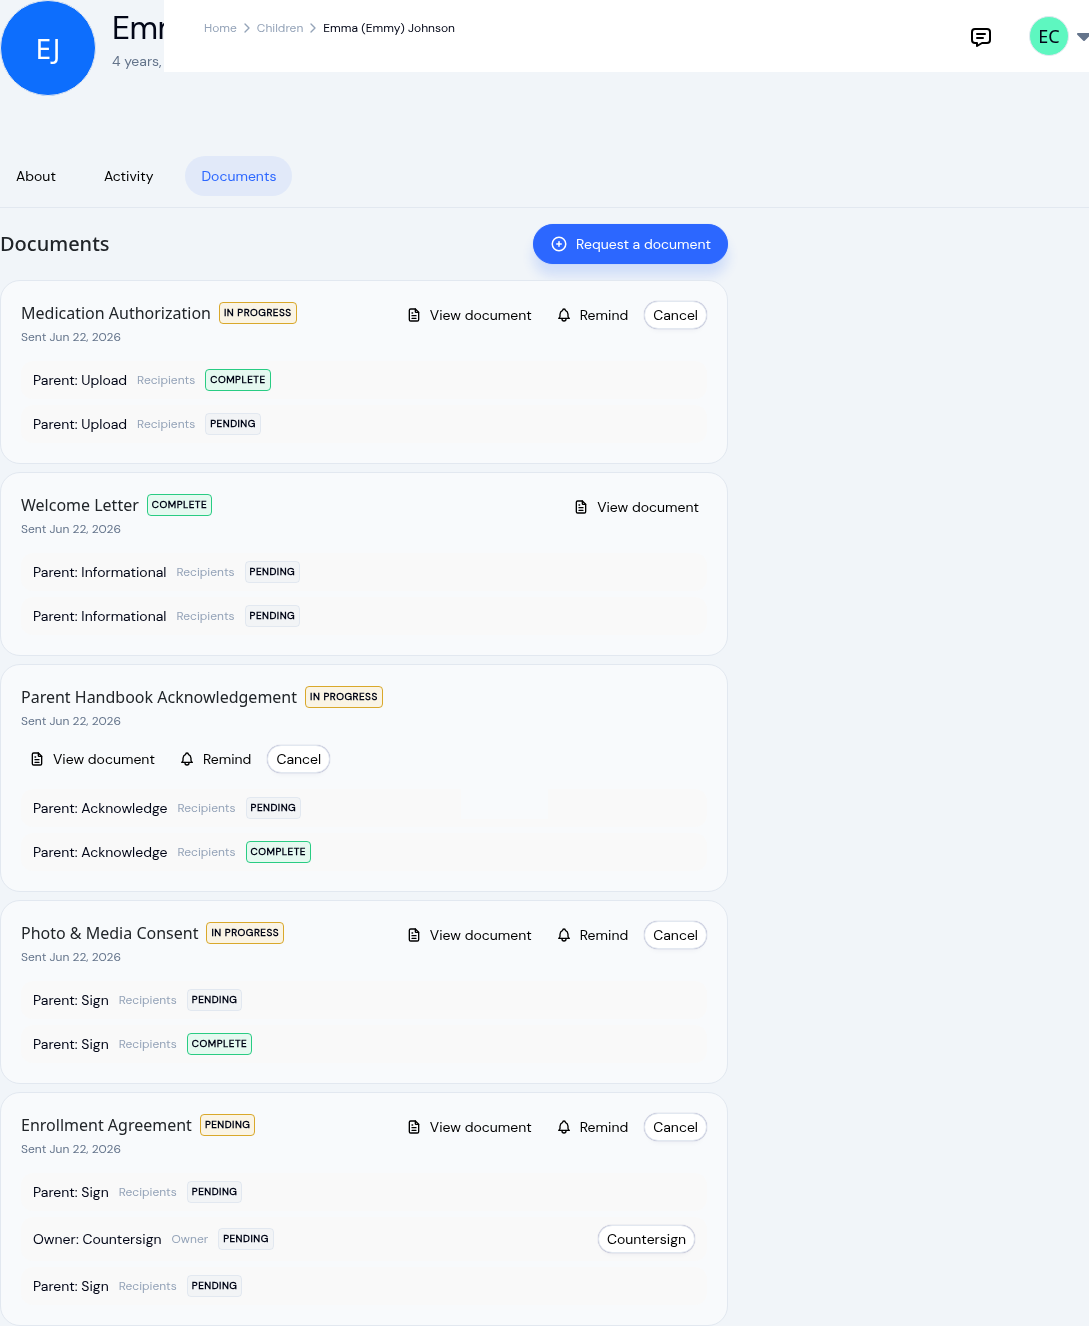
Each request shows the document name, its overall status (Pending, In progress, or Complete), the date it was sent, and a row for each recipient with that person's own status. The same actions you'll find on the Doc Hub Requests page are available here:
- View document — open the original PDF.
- View signed copy — appears once everyone has finished, opening the completed copy with signatures.
- Remind — email everyone who still hasn't completed the request. It shows only while the request is live and someone is still pending, and asks you to confirm first.
- Cancel — stop a request that is no longer needed.
To start a new request for this child, click Request a document. This opens the same send window used in the Doc Hub, already filled in for this child, where you choose a packet or individual documents and how signatures are collected. See Sending & Tracking Documents for the full flow.
If nothing has been sent yet, the tab reads "No document requests have been sent for this child yet."
Actions Menu
Click the ... (three dots) button on the child's profile to access additional actions:
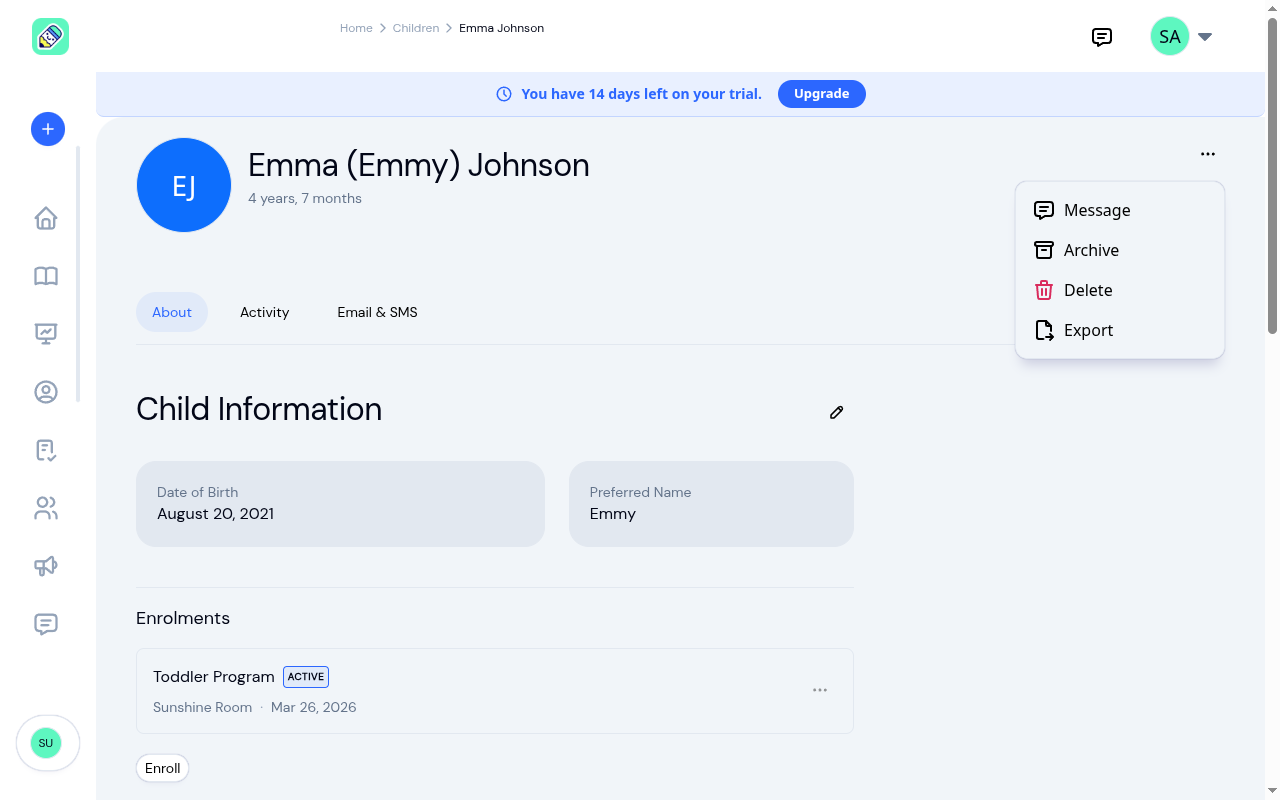
- Message — Send a message to the child's parents
- Archive — Move the child to the archived list
- Delete — Permanently remove the child from your center
- Export — Open a printable copy of the child's record, ready to print or save as a PDF
Editing a Child's Information
From the child's profile page, click the pencil icon next to the "Child Information" heading. A form opens where you can update:
- First name, last name, middle name, and preferred name
- Date of birth
- Profile photo (upload a new one or remove the existing photo)
Click Save to apply your changes.
Managing Parents from a Child's Profile
In the Parent/Guardian Information section of a child's profile:
- Click + to add a new parent and optionally send them an invitation to the Parent Portal
- Click the arrow button on a parent card to view their full details
- Click the pencil button to edit parent information
- Click the trash button to remove the parent link
Archiving a Child
Archiving removes a child from your active roster without permanently deleting their records.
To archive a child, click the ... menu on either the children list or the child's detail page and select Archive.
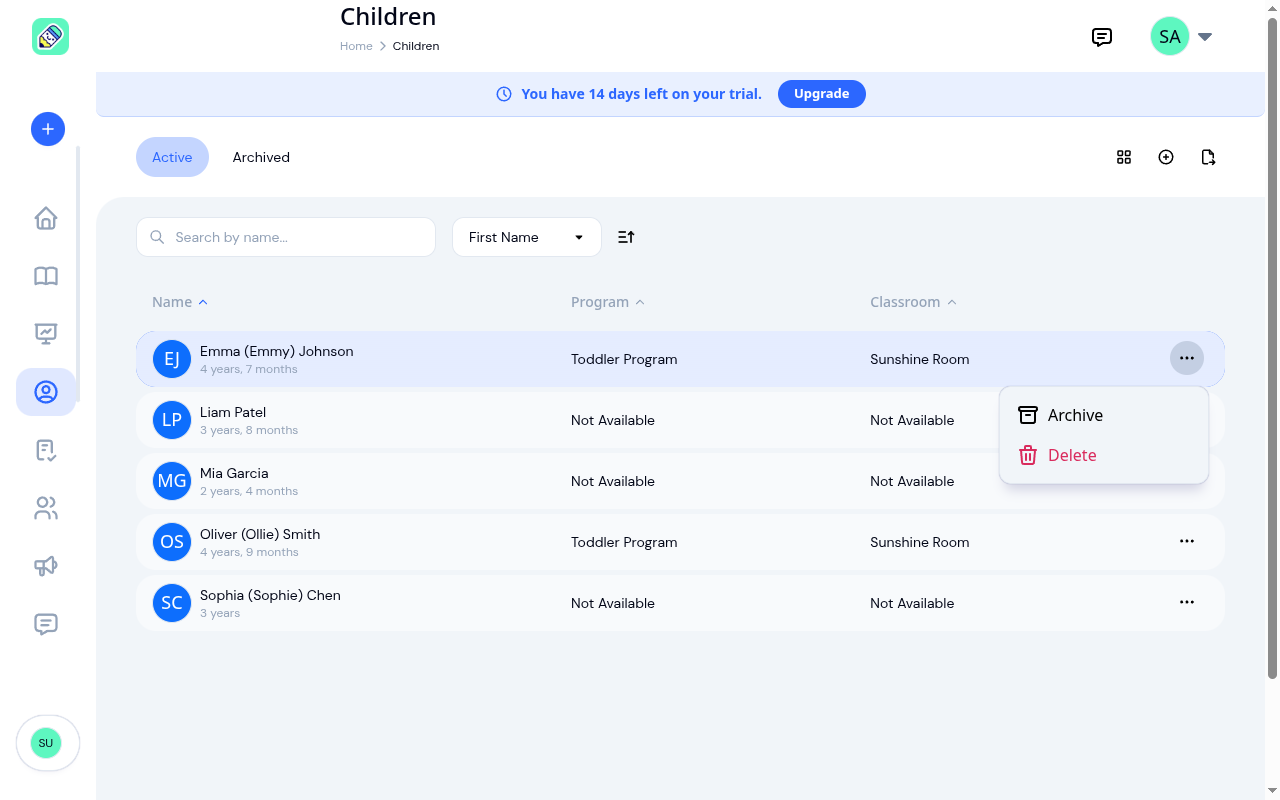
A confirmation dialog appears with the option to notify parents about the archival. When you archive a child:
- All active enrolments are automatically completed
- Any open check-ins are automatically closed
- The child moves to the Archived tab
Archiving Several Children at Once
When you need to archive a whole group (for example, a class that has moved on), you can do it in one step instead of one child at a time.
Select the children
A checkbox appears at the start of each row. Tick the children you want to archive. As soon as you select one, an action bar appears at the bottom of the screen showing how many are selected, with Select All and Deselect All options.
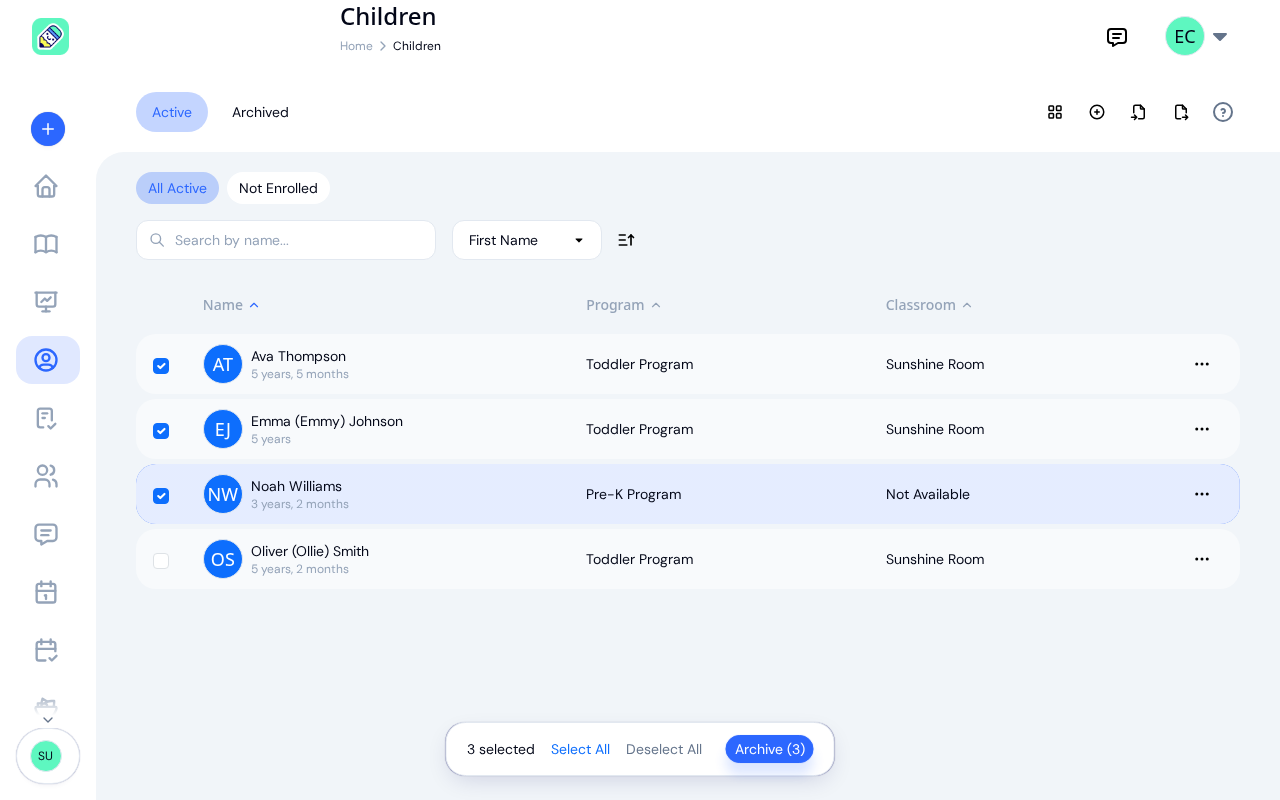
Confirm
Click Archive in the action bar. A confirmation dialog lists the children you're about to archive and lets you choose whether to notify their parents by email.
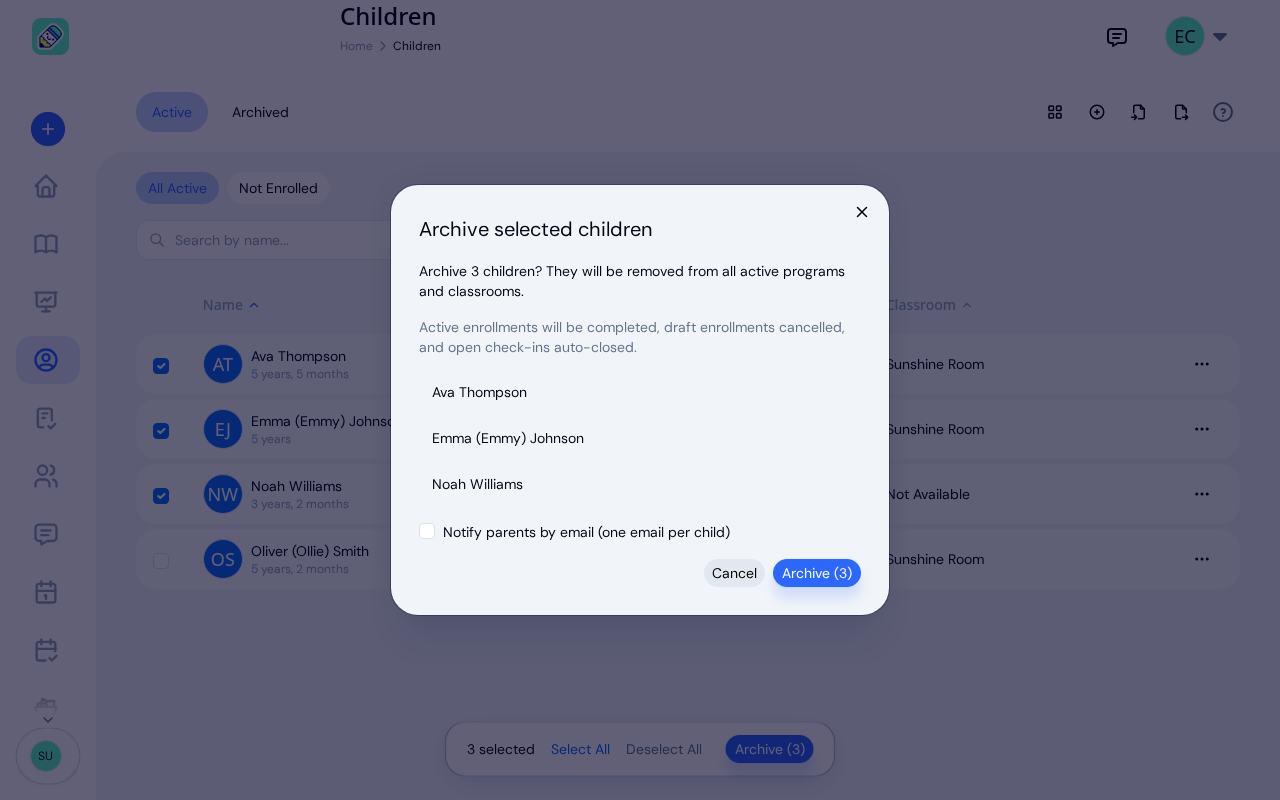
As with archiving a single child, each child's active enrolments are completed, draft enrolments are cancelled, and any open check-ins are closed automatically.
Unarchiving a Child
To restore an archived child, go to the Archived tab, click the ... menu on the child's row, and select Unarchive. The child returns to the active list immediately.
To restore several at once, switch to the Archived tab, tick the children you want to bring back, and click Unarchive in the action bar. Previous enrolments are not restored, so re-enrol the children into programs as needed.
Deleting a Child
To delete a child, click the ... menu and select Delete. A confirmation dialog shows how many enrolments will be cancelled. Click Delete to confirm.
Exporting Children Records
An export is a printable copy of the record: child information, address and health care provider, parents, emergency contacts, medical information, allergies and immunizations. It opens in a new browser tab, where you can print it or save it as a PDF. Nothing downloads on its own.
You can export in two ways:
- One child — From a child's detail page, click the ... menu and select Export
- Every child on the list — Click the Export button (the file icon) in the top-right of the Children list page. The export follows the tab you are on: from Active you get active children only, and from Archived you get archived children only
Either way, a preview opens first so you can check what is about to be printed.
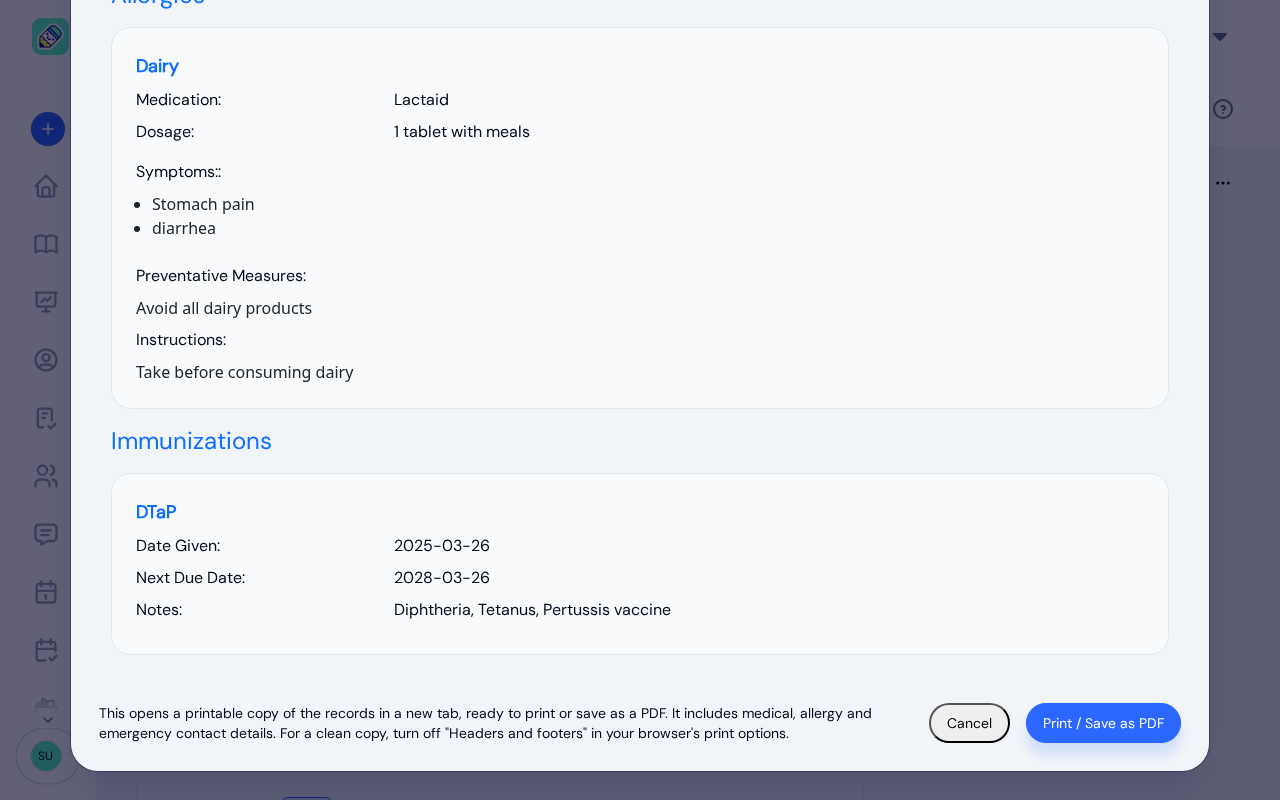
Click Print / Save as PDF to open the printable copy in a new tab. Your browser's print window appears on its own; choose a printer, or pick Save as PDF as the destination to keep a file. Click Cancel to close the preview without printing.
Frequently Asked Questions
Archiving preserves all of the child's records (profile, activity history, attendance) but removes them from your active roster. Active enrolments are completed and open check-ins are closed. You can unarchive them at any time to restore them to the active list.
Yes. You can skip the parent step during child creation and add parents anytime from the child's detail page using the + button in the Parent/Guardian Information section.
Archiving is reversible — the child's records are preserved and can be restored. Deleting is permanent — the child's profile and all associated enrolment records are removed and cannot be recovered.
Your center may have reached its active children limit based on your subscription plan. Upgrade your plan or archive another child to make room.
Straight to that child. The emails owners and admins get when a child is added, or when a child's emergency contact changes, open the child's profile. When a child's medical record is updated, the email to the child's classroom teachers and parents opens the same child in each reader's own view. The link opens the child in the center the child belongs to, switching you to that center first if you belong to more than one. If you're signed out, sign in and you land on the child rather than on your dashboard.
A CSV file with these columns: First Name, Last Name, Middle Name, Preferred Name, Date of Birth, Class, and Program. Download the template from the import screen to get a file with the columns already set up. First Name and Last Name are required; the rest are optional (a Date of Birth, if included, must be a recognizable date).
The preview lists any programs and classrooms that aren't in your center yet. Tick the ones you want KidzLog to create during the import. If you leave one unticked, the rows that use it won't be imported until you either tick it or change those rows to use an existing program and classroom.
After importing, click the download button on the results screen (for example Download 2 rows to fix). This gives you a CSV containing only the rows that failed, along with the reason for each. Correct those rows and import the file again.