

Kiosk Mode
Kiosk Mode turns a tablet or computer at your center's entrance into a self-service check-in/out station. Parents enter their PIN to check their children in or out, without needing staff assistance.
How It Works
- A staff member enables Kiosk Mode from the Attendance page
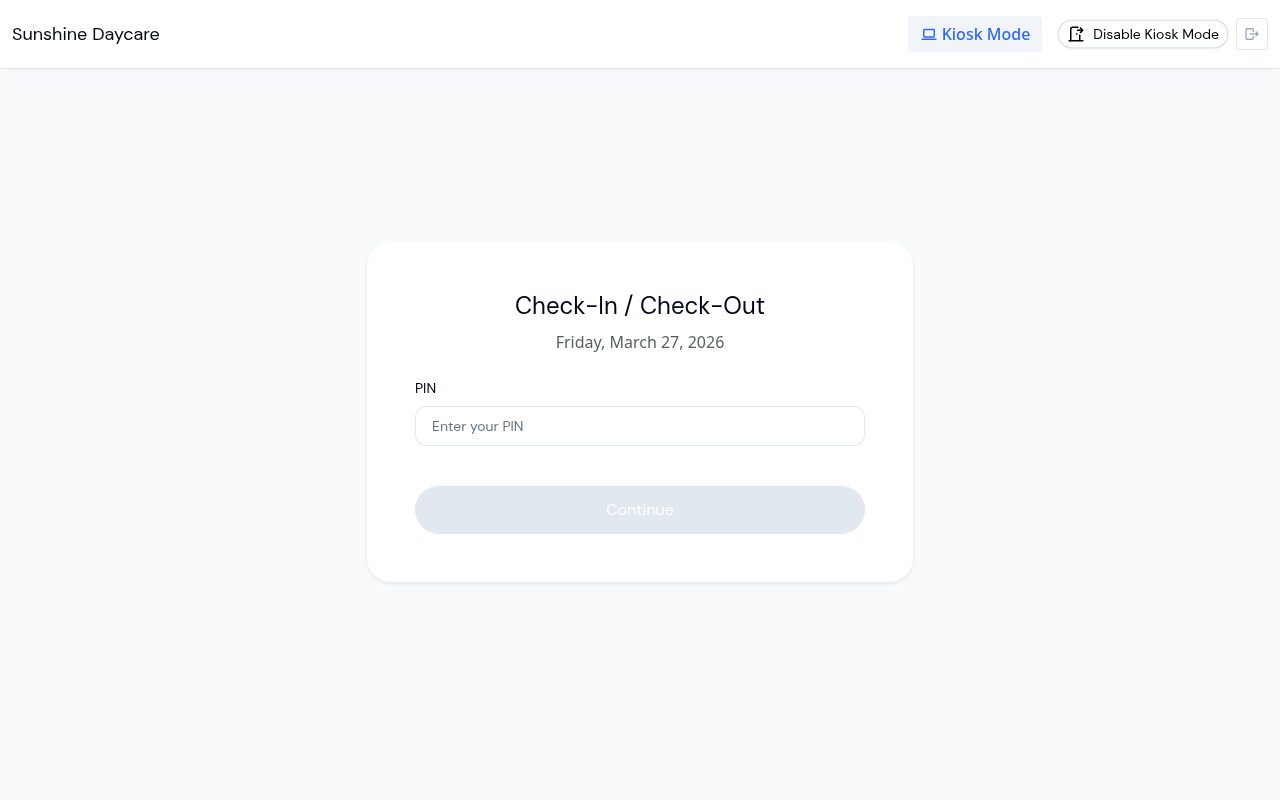
- The screen switches to a large, touch-friendly PIN entry interface
- Parents enter their personal PIN (found on their parent profile)
- They select their children and check in, check out, or mark absent
- A confirmation screen appears briefly, then the PIN screen returns for the next parent
Kiosk Mode is available to every center from the start. The Kiosk Mode button appears on the Attendance page whenever you are viewing today's date, unless your center has switched Use Kiosk Mode off in Attendance Settings.
Enabling Kiosk Mode
Go to the Attendance page
Navigate to the Attendance page from the sidebar.
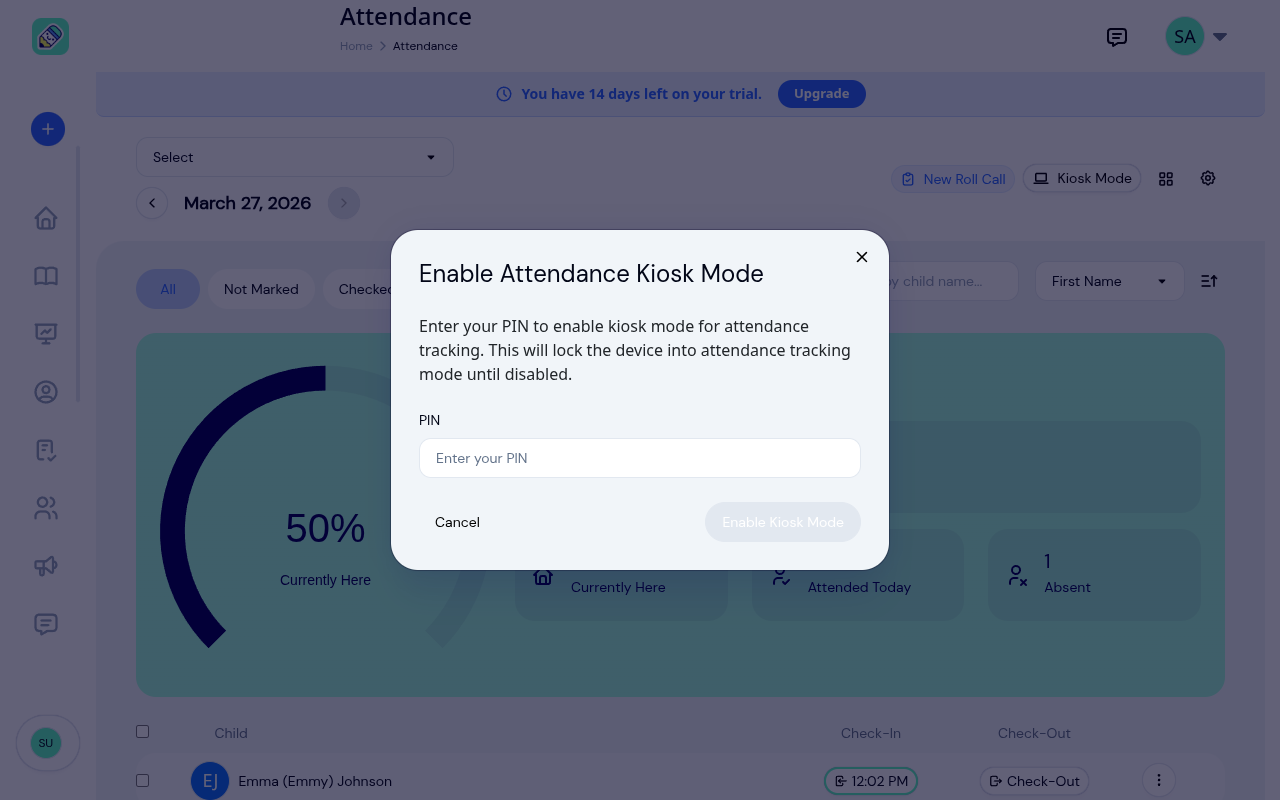
Click Kiosk Mode
Click the Kiosk Mode button in the top-right area of the page.
Enter the staff PIN
You'll be prompted to enter a staff PIN to enable kiosk mode. This prevents unauthorized access.
The kiosk screen appears
Once enabled, the screen switches to the kiosk interface — a full-screen PIN entry with the prompt "Check In / Check Out".
Parent Kiosk Flow
When a parent arrives at the kiosk:
Enter PIN
The parent enters their personal numeric PIN on the keypad.
Health Screening (if enabled)
If health screening is turned on in your Attendance Settings, the parent completes a health questionnaire for each child before proceeding.
Select children
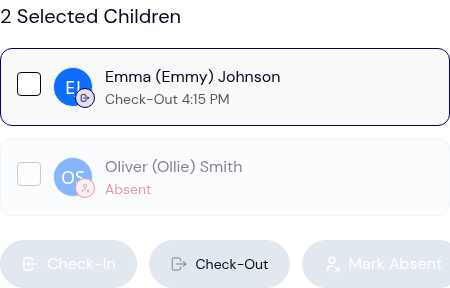
The parent sees a list of their children. Each child who has already been marked for the day carries a small coloured status dot and a short label in the corner of their card, so the parent can tell at a glance who is already signed in:
- Checked-in (green) — currently at the center
- Checked-out (blue) — came in and has since left
- Absent (red) — marked absent
A child who hasn't been marked yet shows no status. The parent selects one or more children using the checkboxes.
Choose an action
Three large buttons appear at the bottom:
- Check-In — mark selected children as present
- Check-Out — check out selected children
- Mark Absent — mark selected children as absent
The parent can also add notes before confirming.
Sign to confirm (if enabled)
If your center collects digital signatures, a Sign to confirm step appears next. The parent can Draw their signature with a finger or mouse, or switch to Type and enter their name in a handwriting style, then tap Continue. Clear wipes the pad to start over.
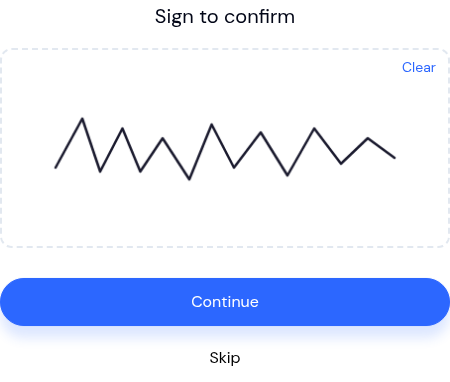
When signatures are set to Optional, a Skip button lets the parent continue without signing. When set to Required, a signature must be added before the parent can continue. This step does not appear when signatures are disabled.
Confirmation
A success screen appears briefly, then the kiosk returns to the PIN entry screen for the next parent.
Parent PINs
Each parent has a unique numeric PIN for kiosk access. To find a parent's PIN:
Go to the parent's profile
Navigate to Parents and click on the parent.
Find the Kiosk PIN section
Look for the Kiosk PIN section on the parent detail page. Click Show to reveal the PIN.
Health Screening
When health screening is enabled, the kiosk adds a Health Screening Check step before attendance. The parent sees their children, each with a status:
- Screened — passed today's screening.
- Did not pass — answered in a way that flags a concern today.
- Pending — not screened yet.
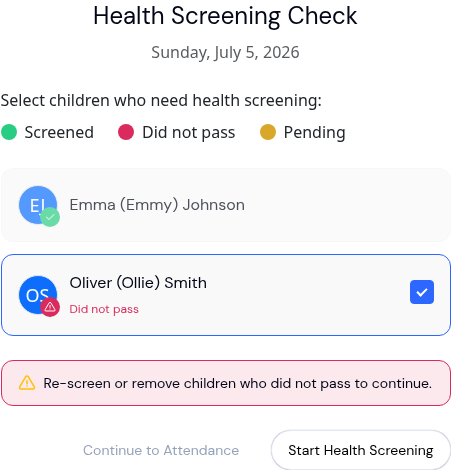
The parent ticks the children who still need screening, taps Start Health Screening, and answers the yes/no health questions for each one. A child who answers in the clear is marked Screened; a child who flags a concern is marked Did not pass.
A child who did not pass cannot be checked in. While any selected child is in that state, a reminder appears — "Re-screen or remove children who did not pass to continue." — and the button to continue to attendance stays disabled until that child is re-screened (and passes) or unticked.
Once everyone is cleared, the kiosk shows All Children Have Been Screened and the parent continues to the attendance step. Screening results are recorded and visible to staff on the main Attendance page.
Kiosk Settings
Configure Kiosk Mode in Attendance Settings:
- Use Kiosk Mode — on by default. Switch it off to remove the Kiosk Mode button from the Attendance page
- Health screening — turn health screening on or off, choose whether parents can complete it from home, and customize the health questions
Idle Timeout
For security on a shared device, kiosk mode automatically signs out after a period of inactivity (one hour). A countdown indicator appears when less than two minutes remain. When the timeout is reached, kiosk mode is turned off and the staff member is logged out, so a staff PIN is needed to start a new kiosk session.
Exiting Kiosk Mode
To return to the normal Attendance page, a staff member clicks the exit option and enters the staff PIN again. This ensures that only authorized staff can exit kiosk mode — parents cannot accidentally navigate away from the kiosk screen.